Controller Fixing Guide and Technical Information
by Jpep
Video Reference: OddTinkering’s Controller Repair
This guide contains 3 sections: a cleaning guide, a guide to decrease resistance from the triggers, and a control stick guide.
Necessary Tools
- You will need a Y1 tri-point (not a tri-wing!) screwdriver to open the back panel and a Phillips 0 screwdriver to take apart the triggers. Smaller sizes can work as well.
- The bit set I use in this guide can be found here. It contains many bits that are of no use for the GCC so you may want to buy individual screwdrivers instead.
- A Phillips screwdriver is not necessary to swap the back panels from 2 controllers.
- Q-tips and rubbing alcohol will be used to clean the motherboard.
Cleaning
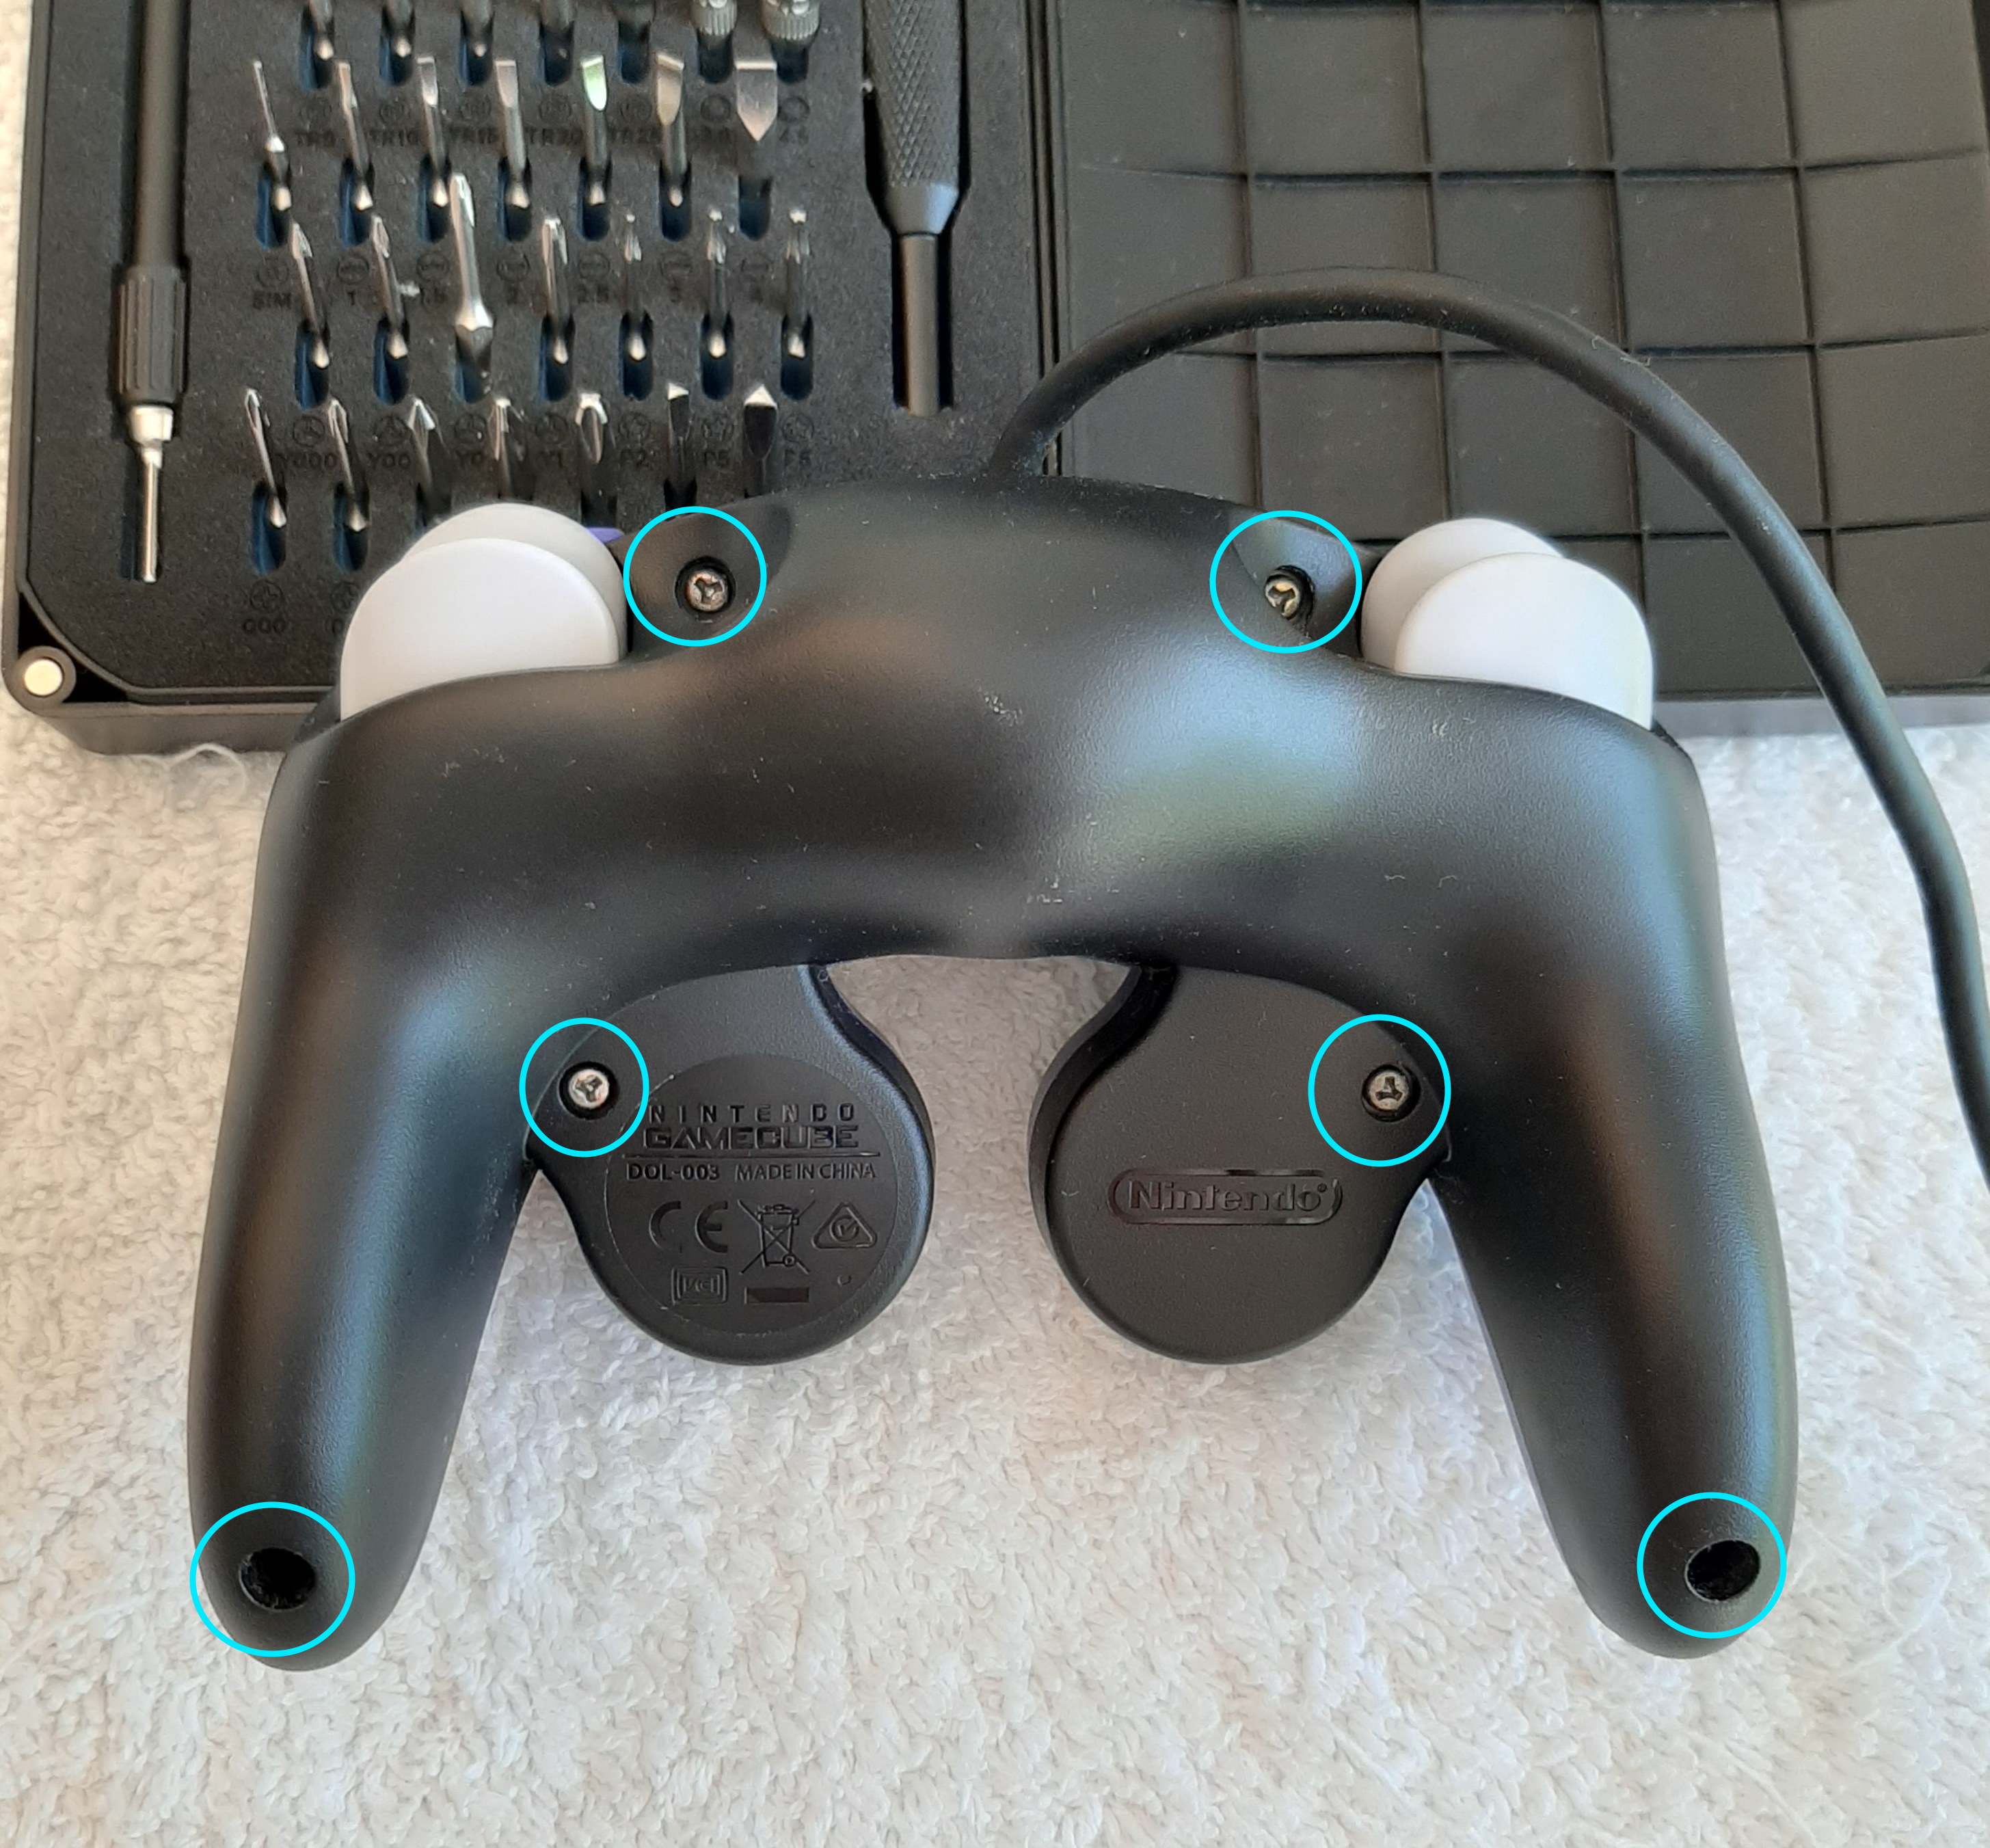
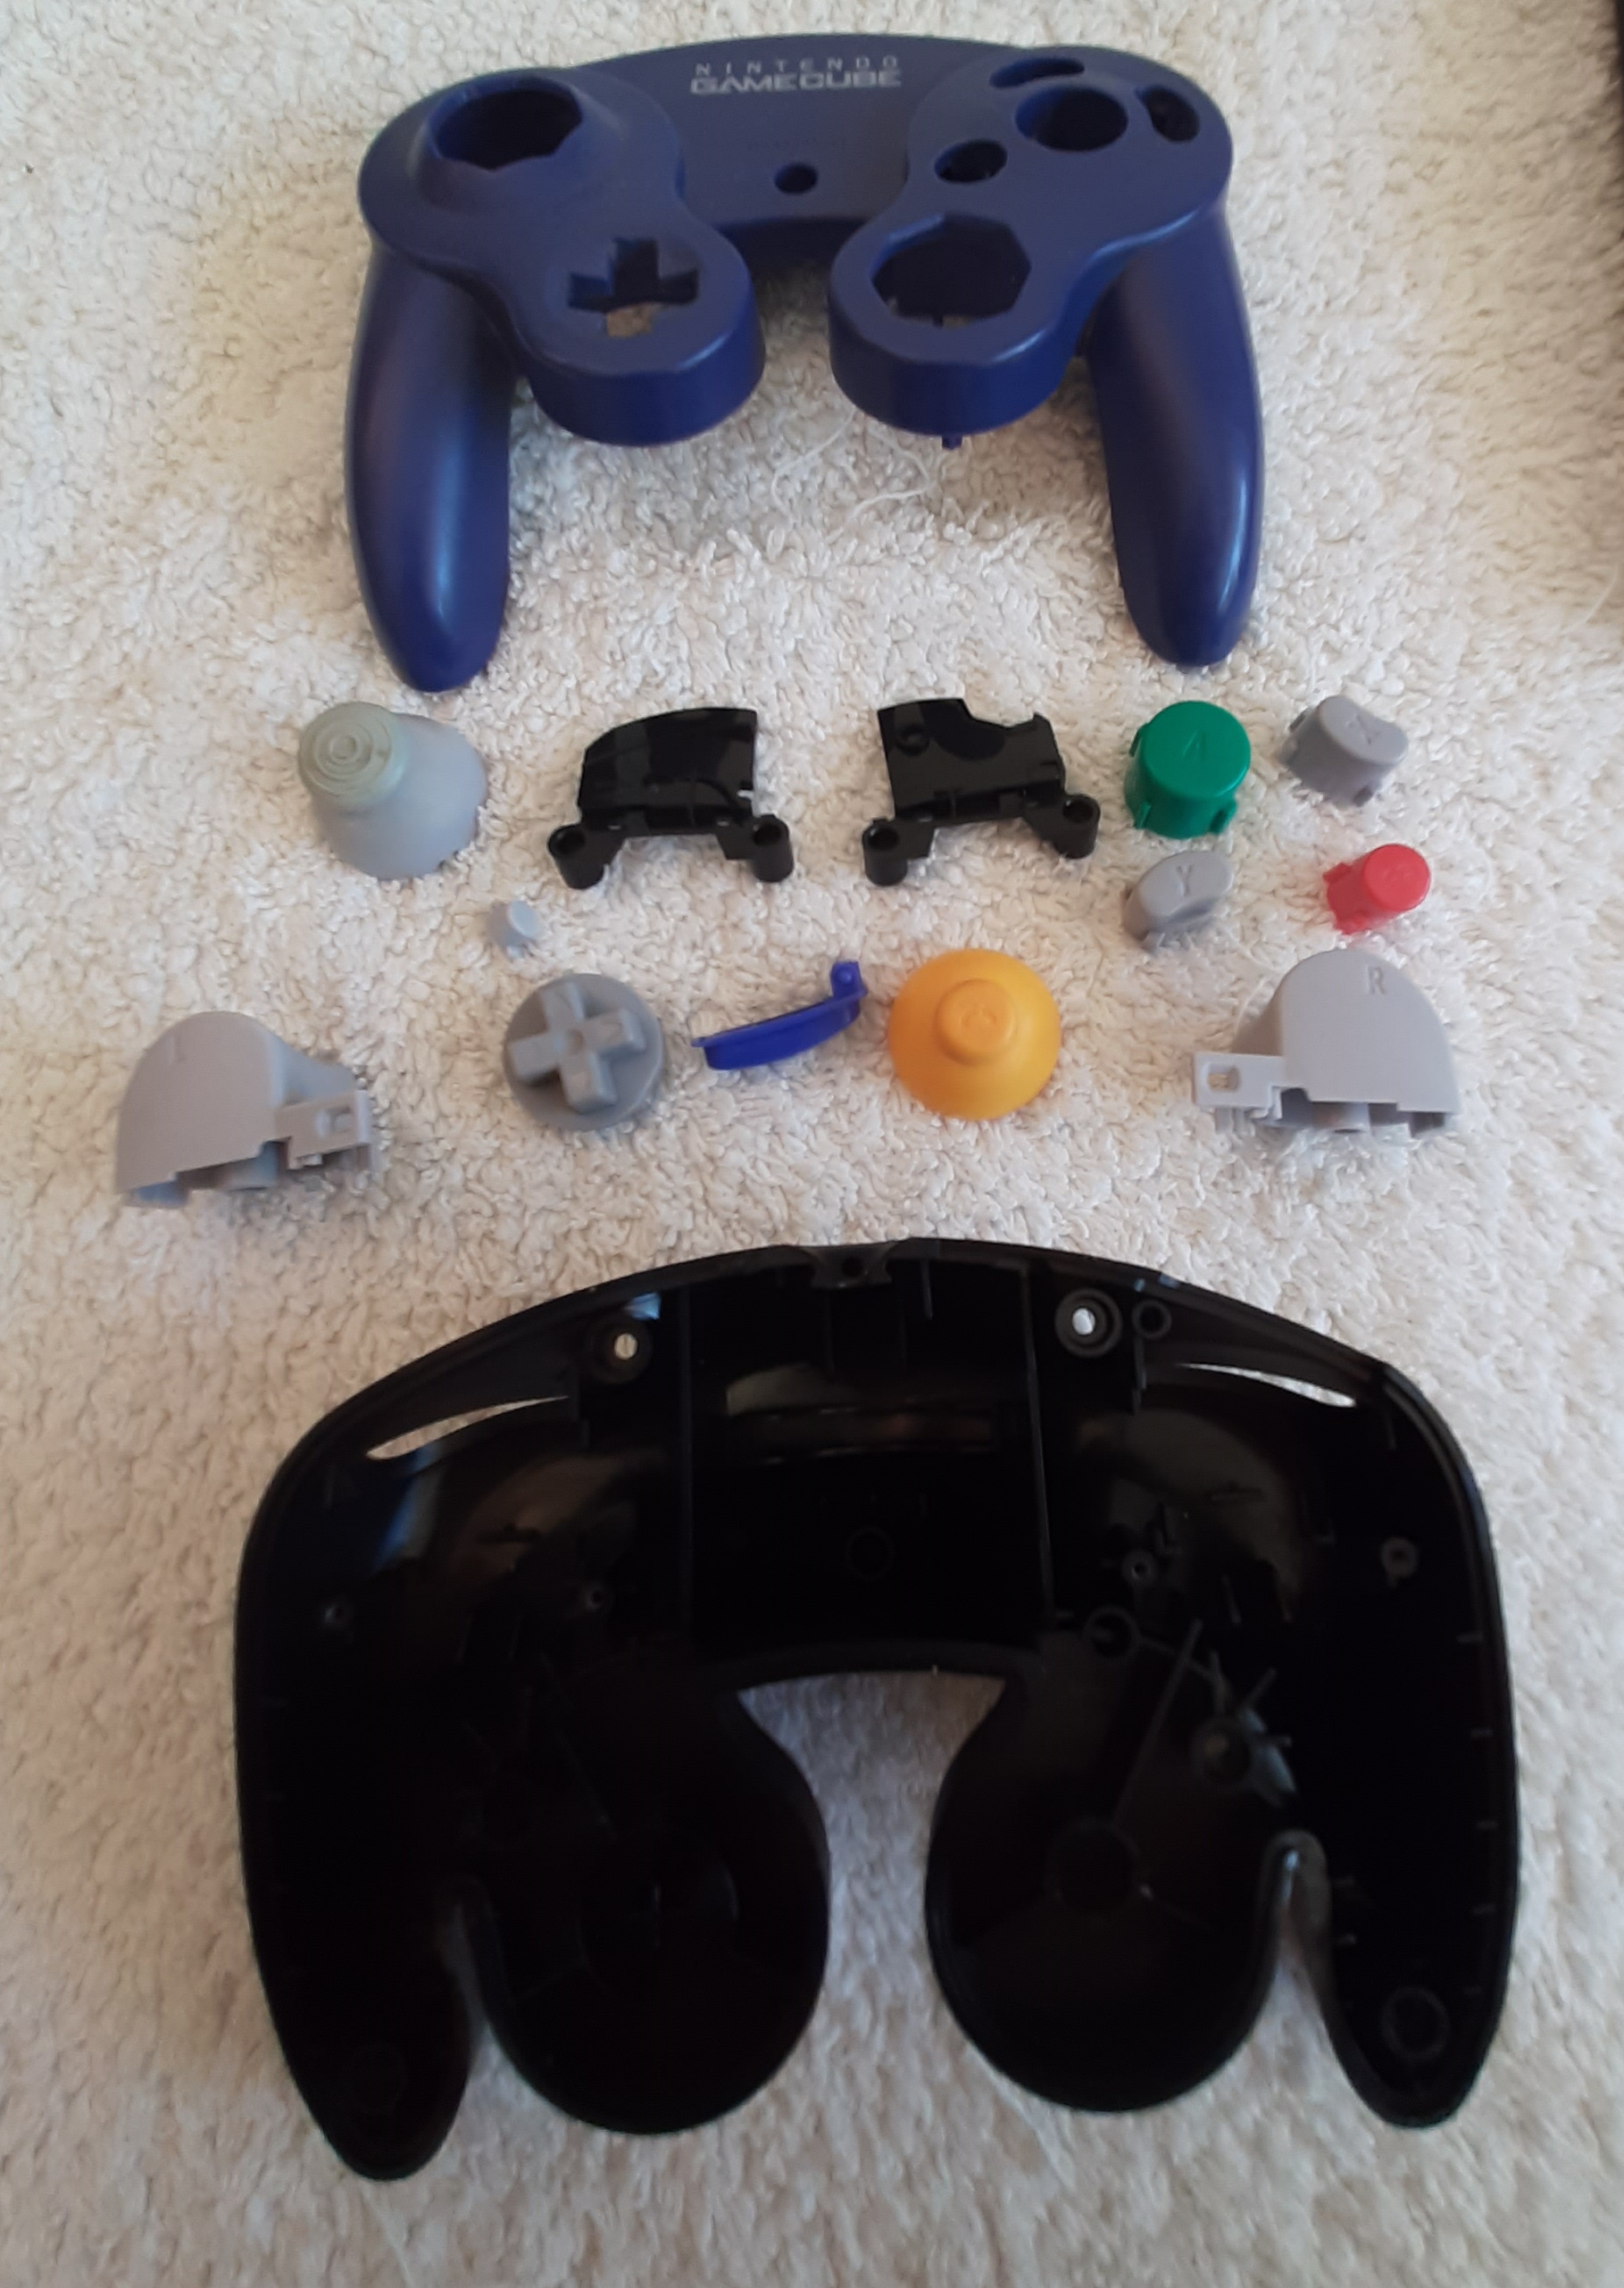
- Locate and remove the 6 tri-point screws on the back of the controller.
- Pull on the back panel to separate the 2 halves of the controller.
- The Z-button is not locked in place and may fall off on its own when you do this. If it doesn’t, pull on it gently to remove it.
- Grab the corners of the motherboard inside the front shell and gently pull away to free it. Avoid grabbing and pulling on the rumble motor, it comes apart easily.
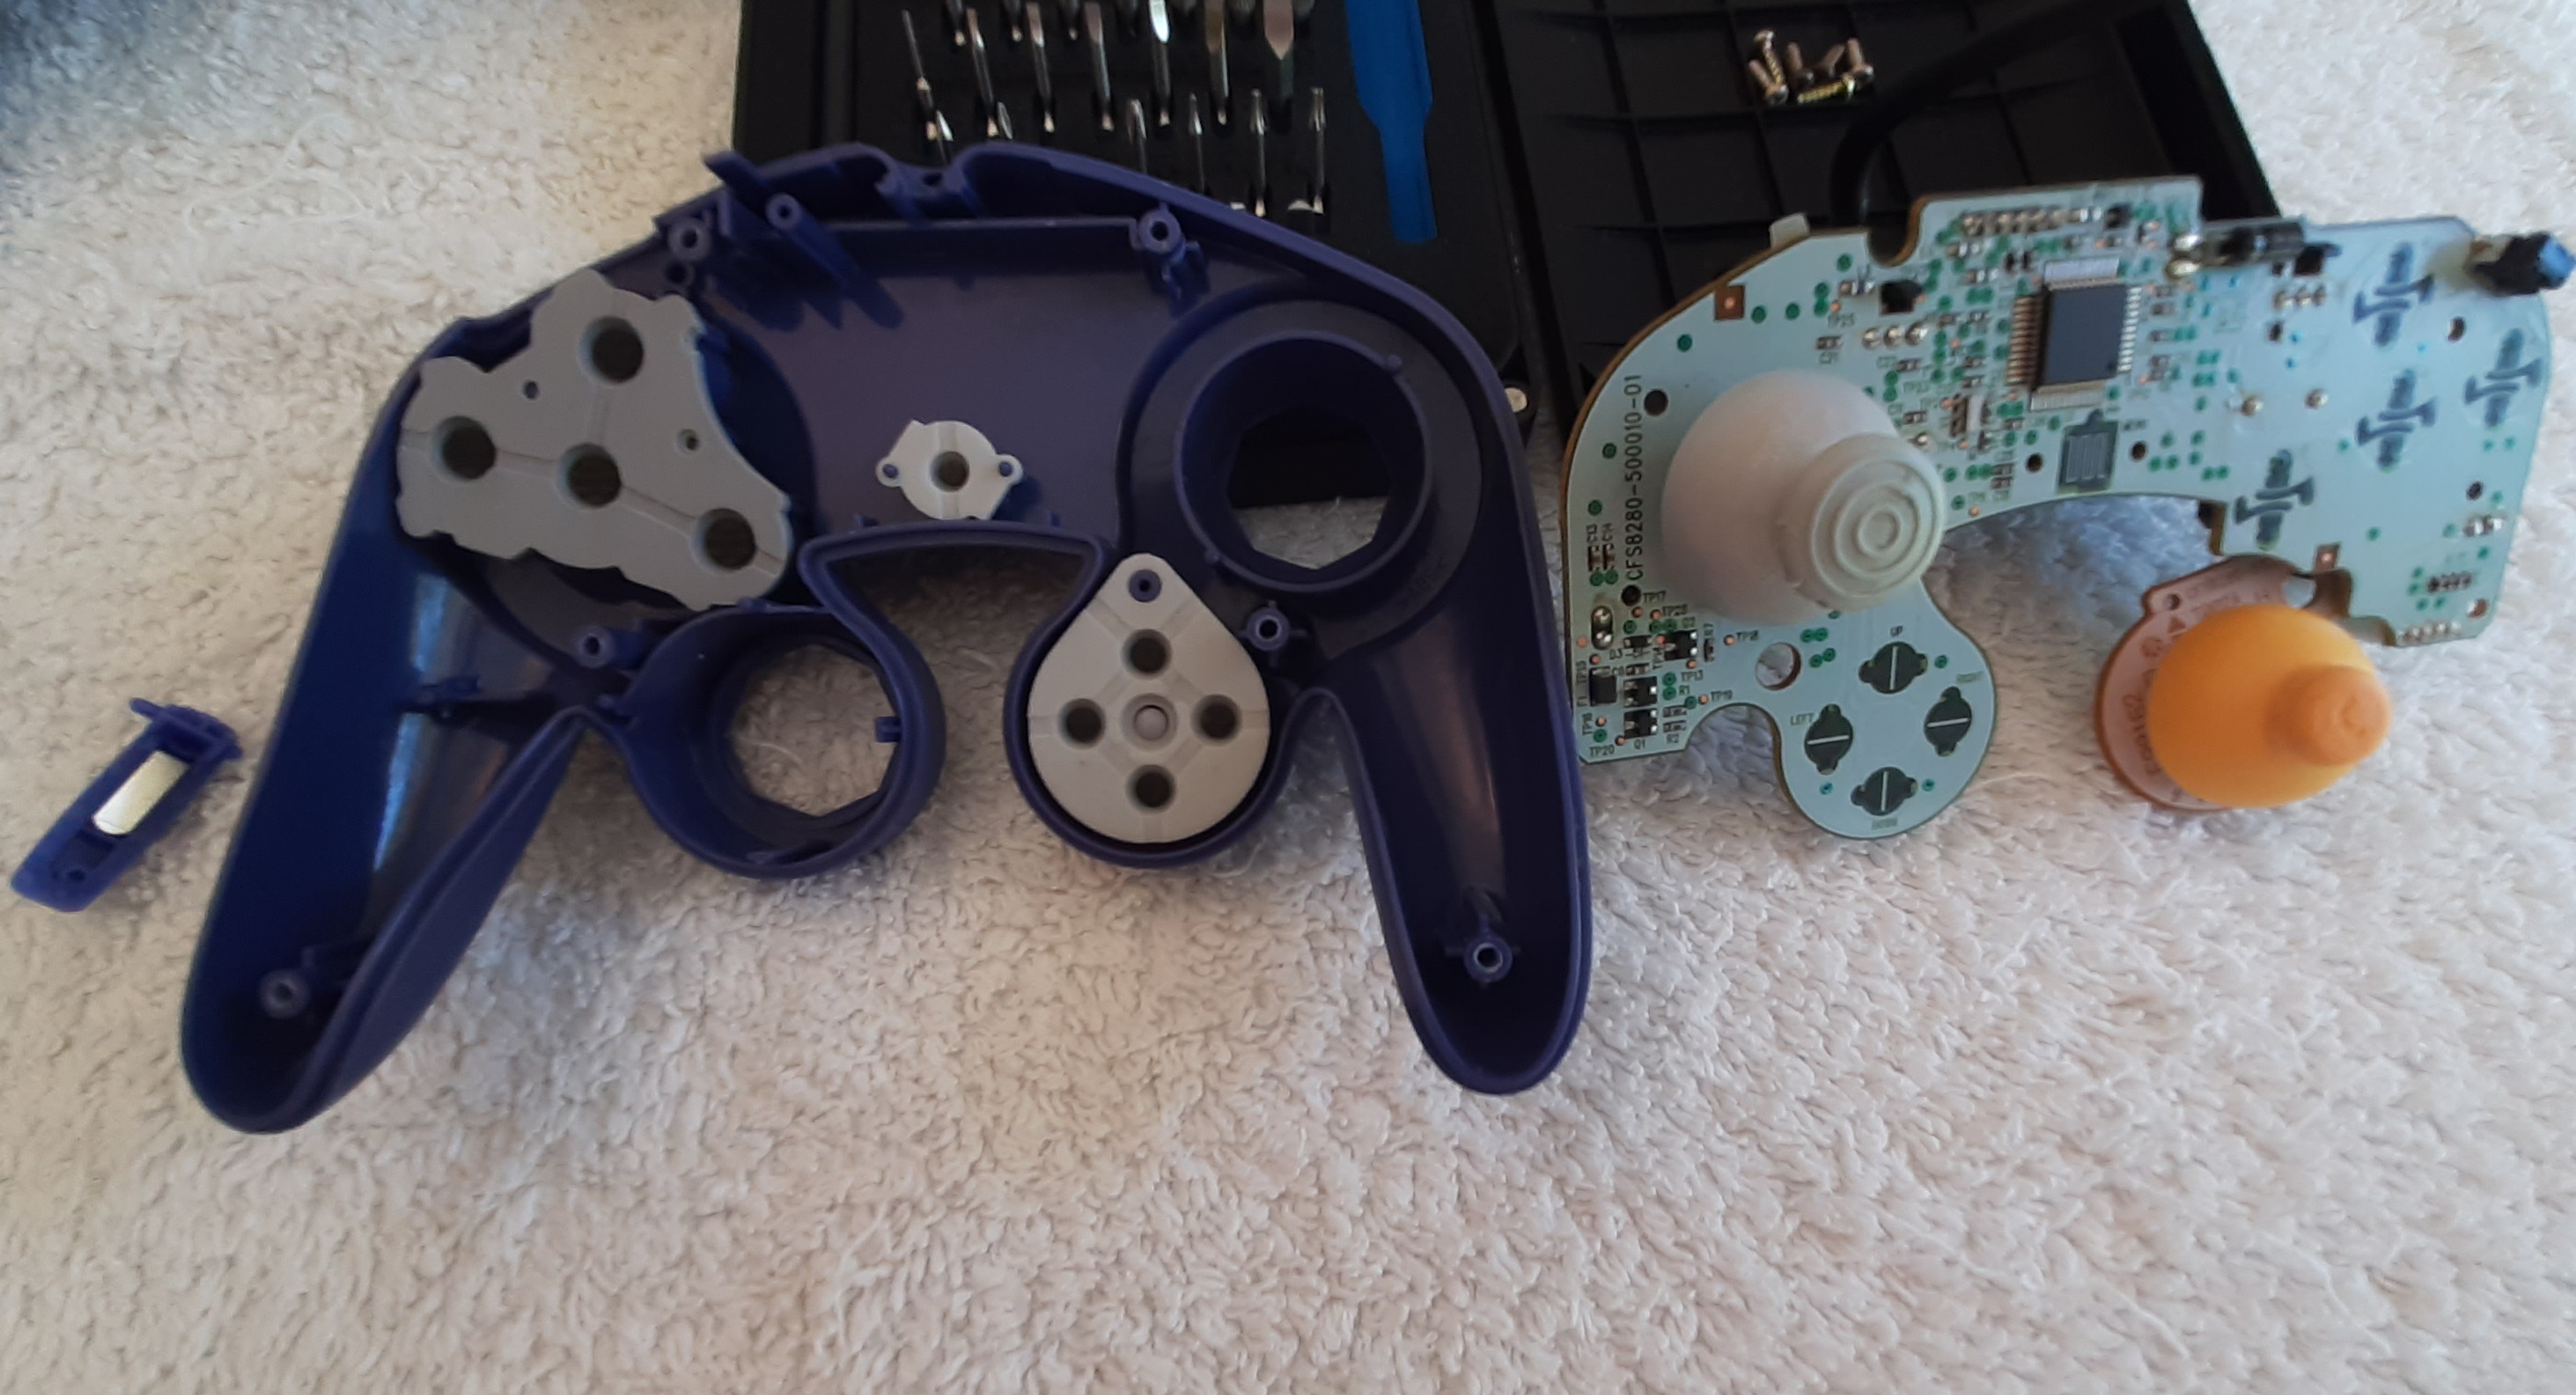
- Pull on the grey contact pads gently and remove them.
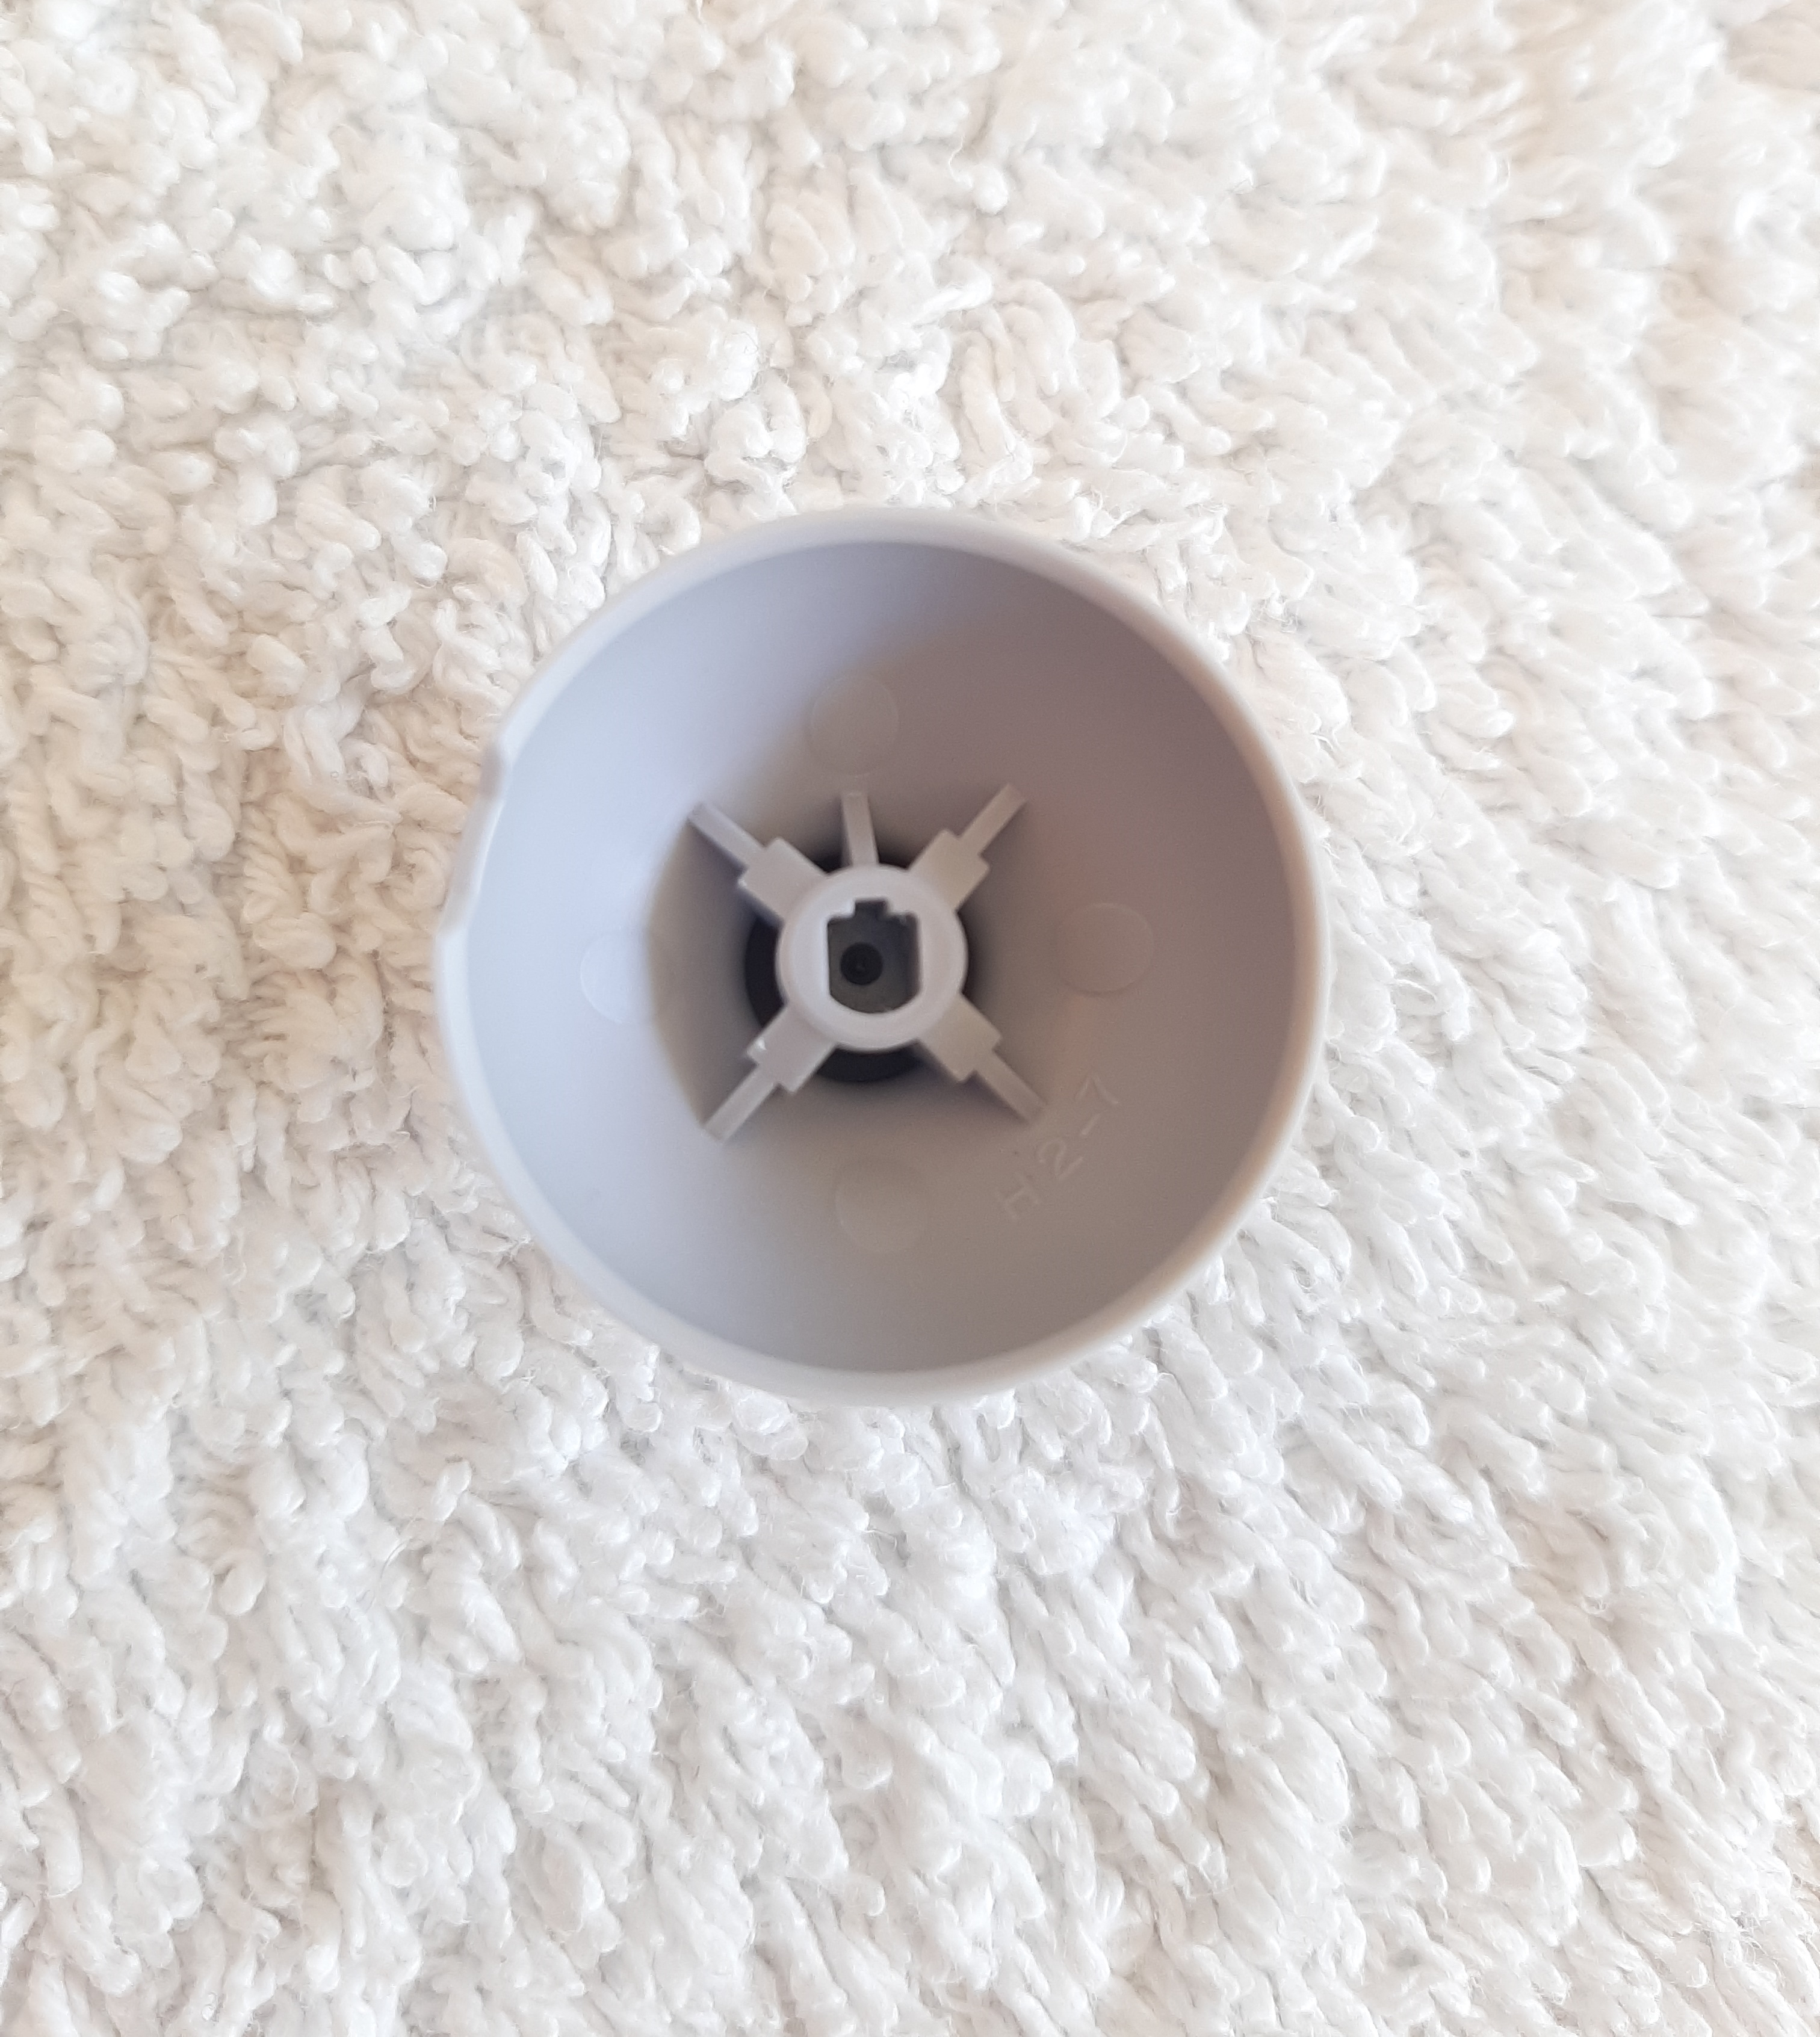
- Pull on the Control Stick and the C-Stick away from the motherboard until they come off. They are stuck in place quite tightly so don’t be afraid to pull hard.
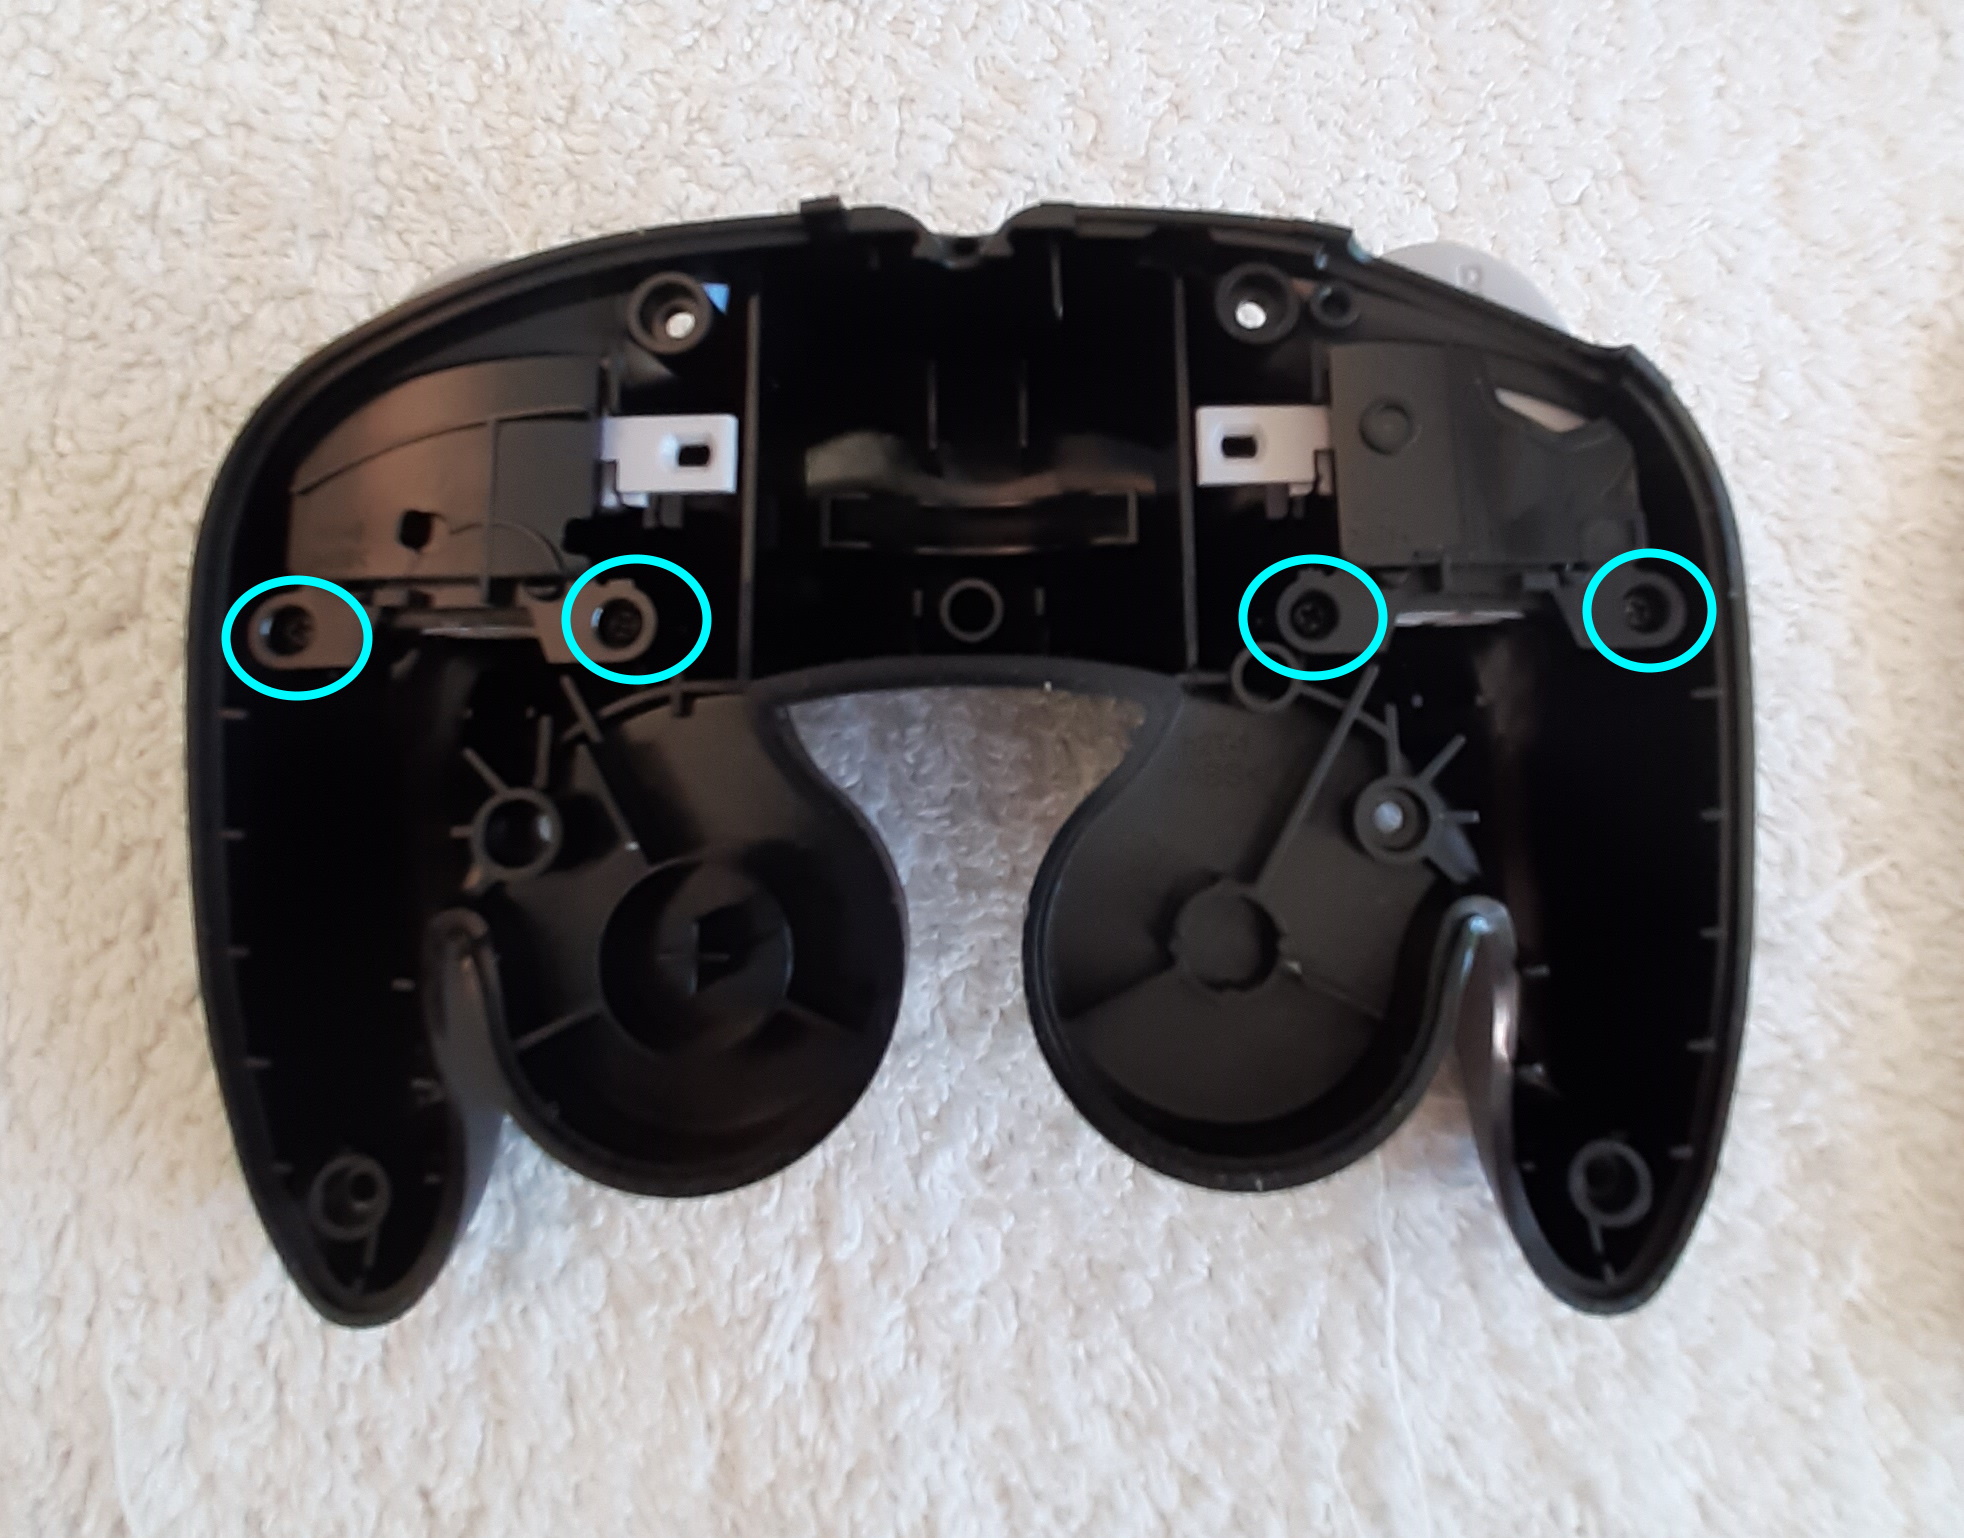
- On the back shell, locate and remove the 4 Phillips screws.
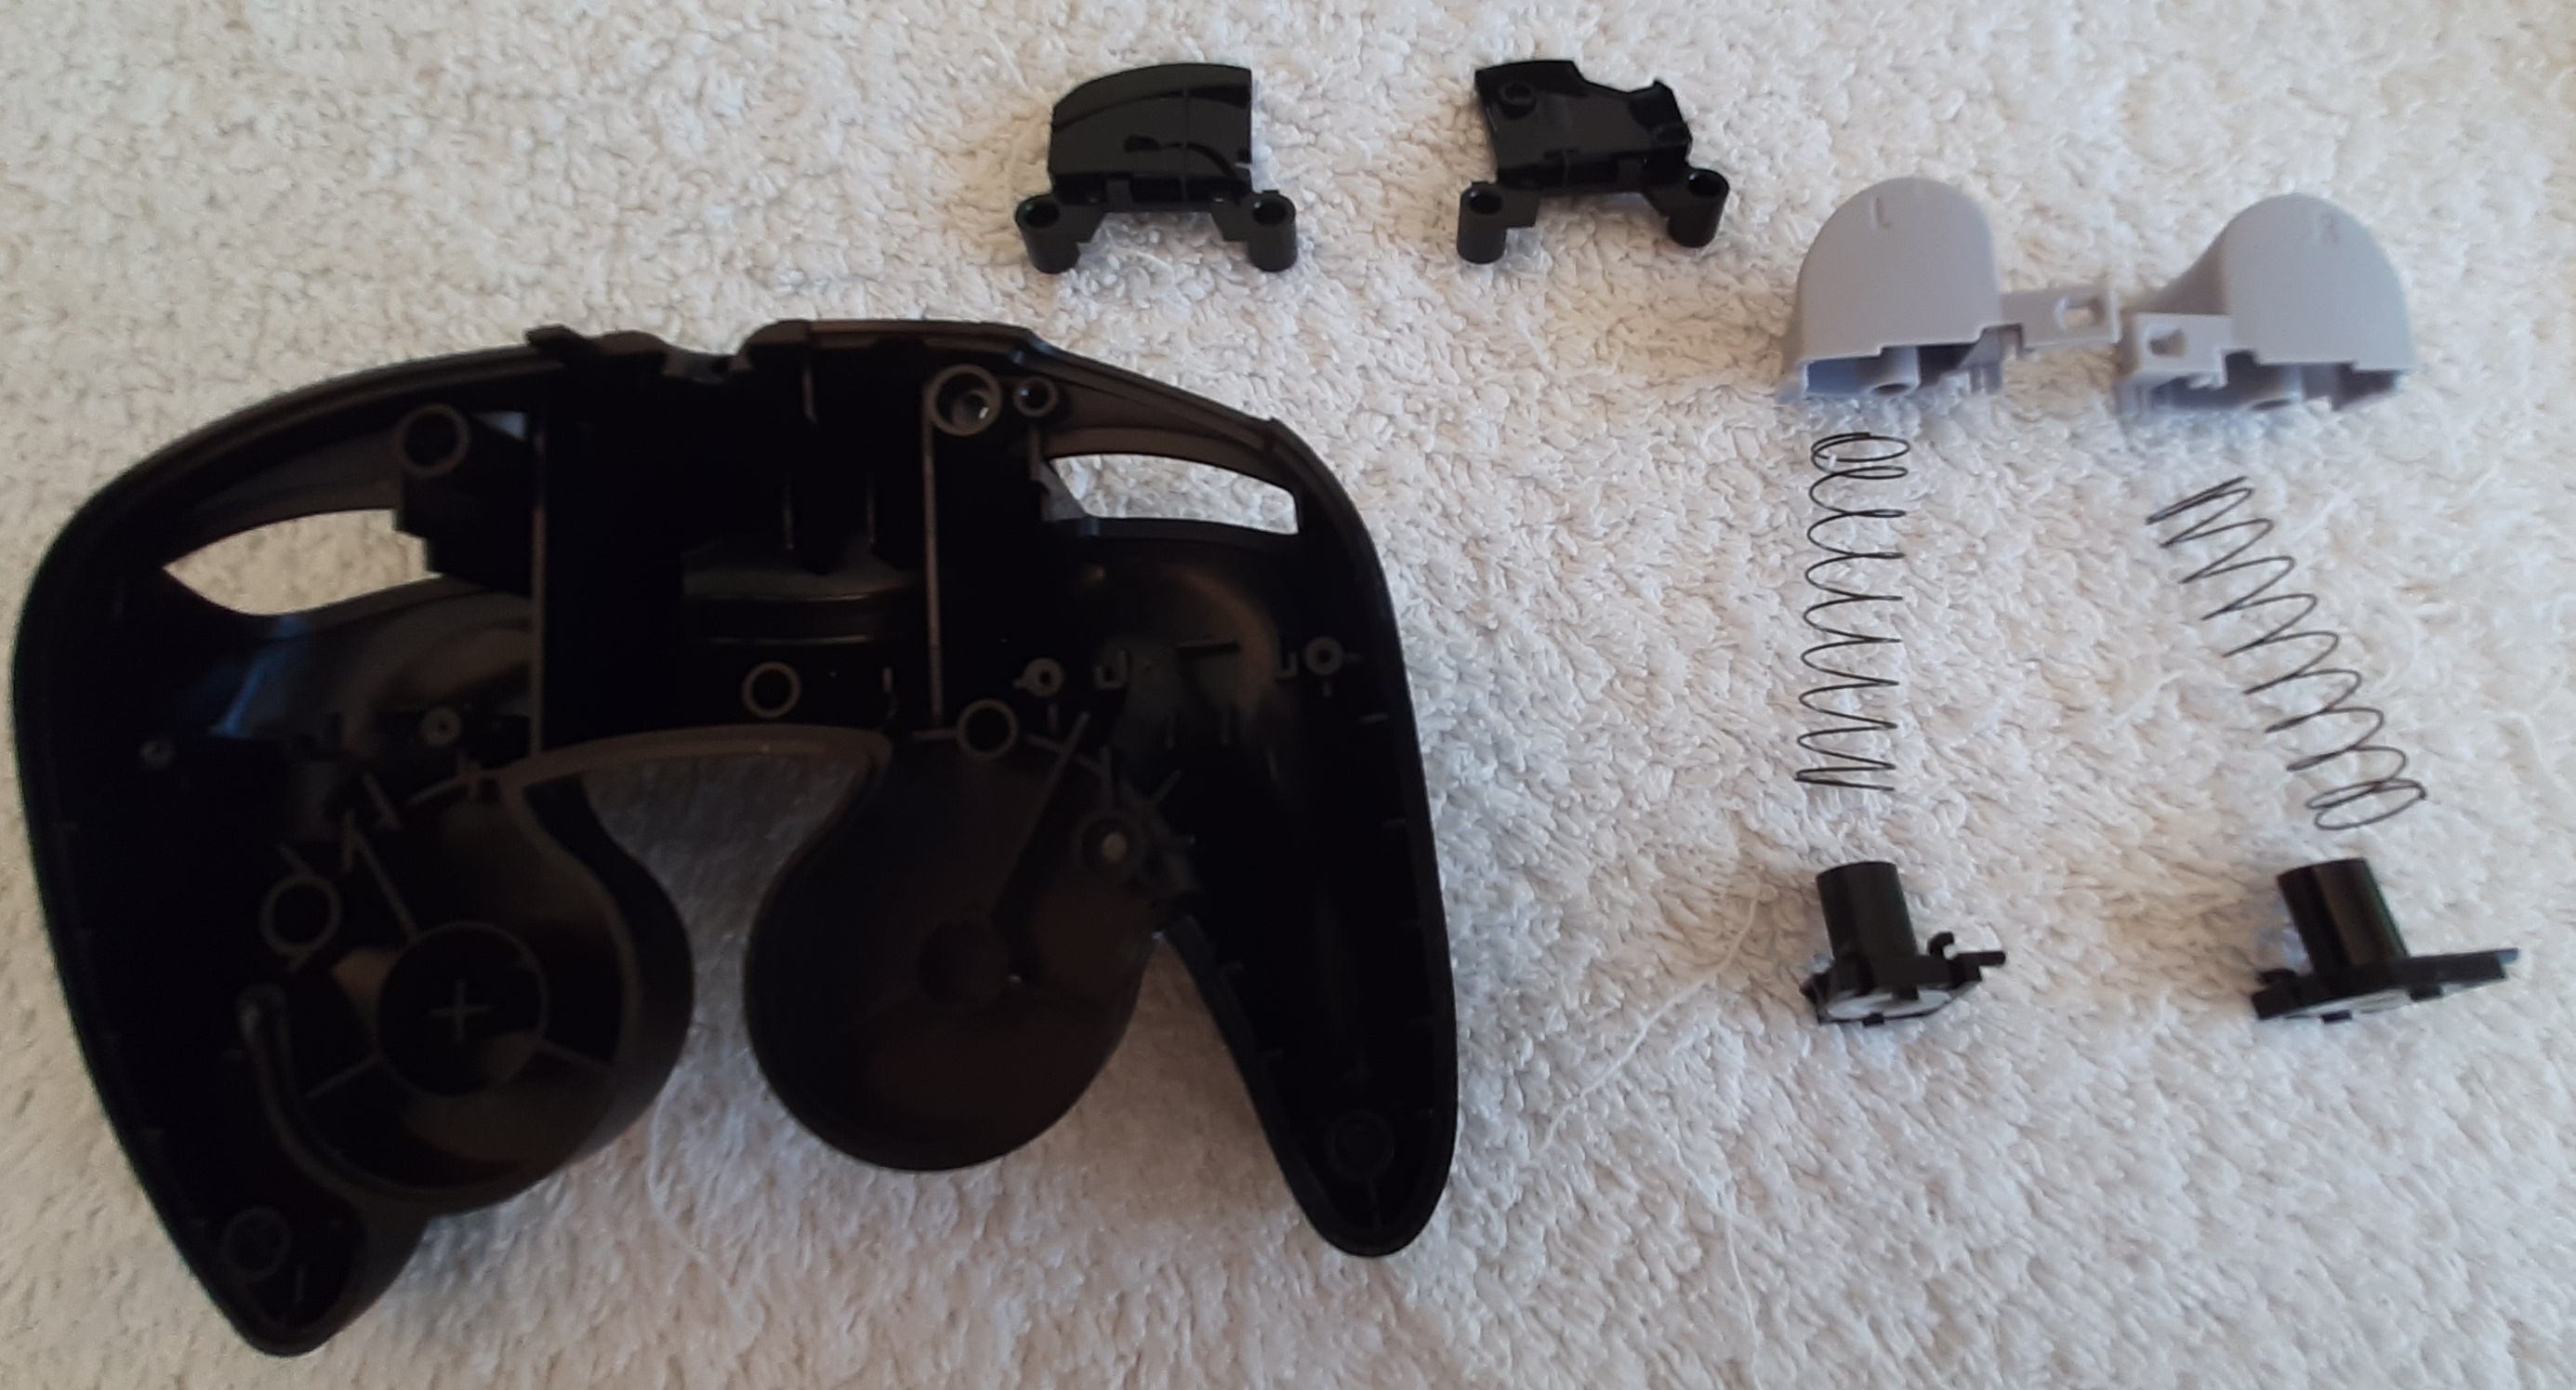
- Remove the plastic plates on the triggers.
- To remove the triggers, press down on them and pull them in and towards you.
- There may be a metal bracket holding the trigger trogether. If necessary, remove it so the spring and contact pads can come undone.
- It is usually recommended to remove this metal bracket piece entirely as it creates a lot of friction when pressing down on the trigger.
- Take the shells, the buttons and the triggers and let them stew in warm soapy water for 15-20 minutes.
- Once done, scrub them thoroughly with a toothbrush to get rid of any dirt, dead skin, or oils.
- Gently wash the contact pads in warm soapy water, again with the toothbrush. They are somewhat delicate so don’t put too much force into it.
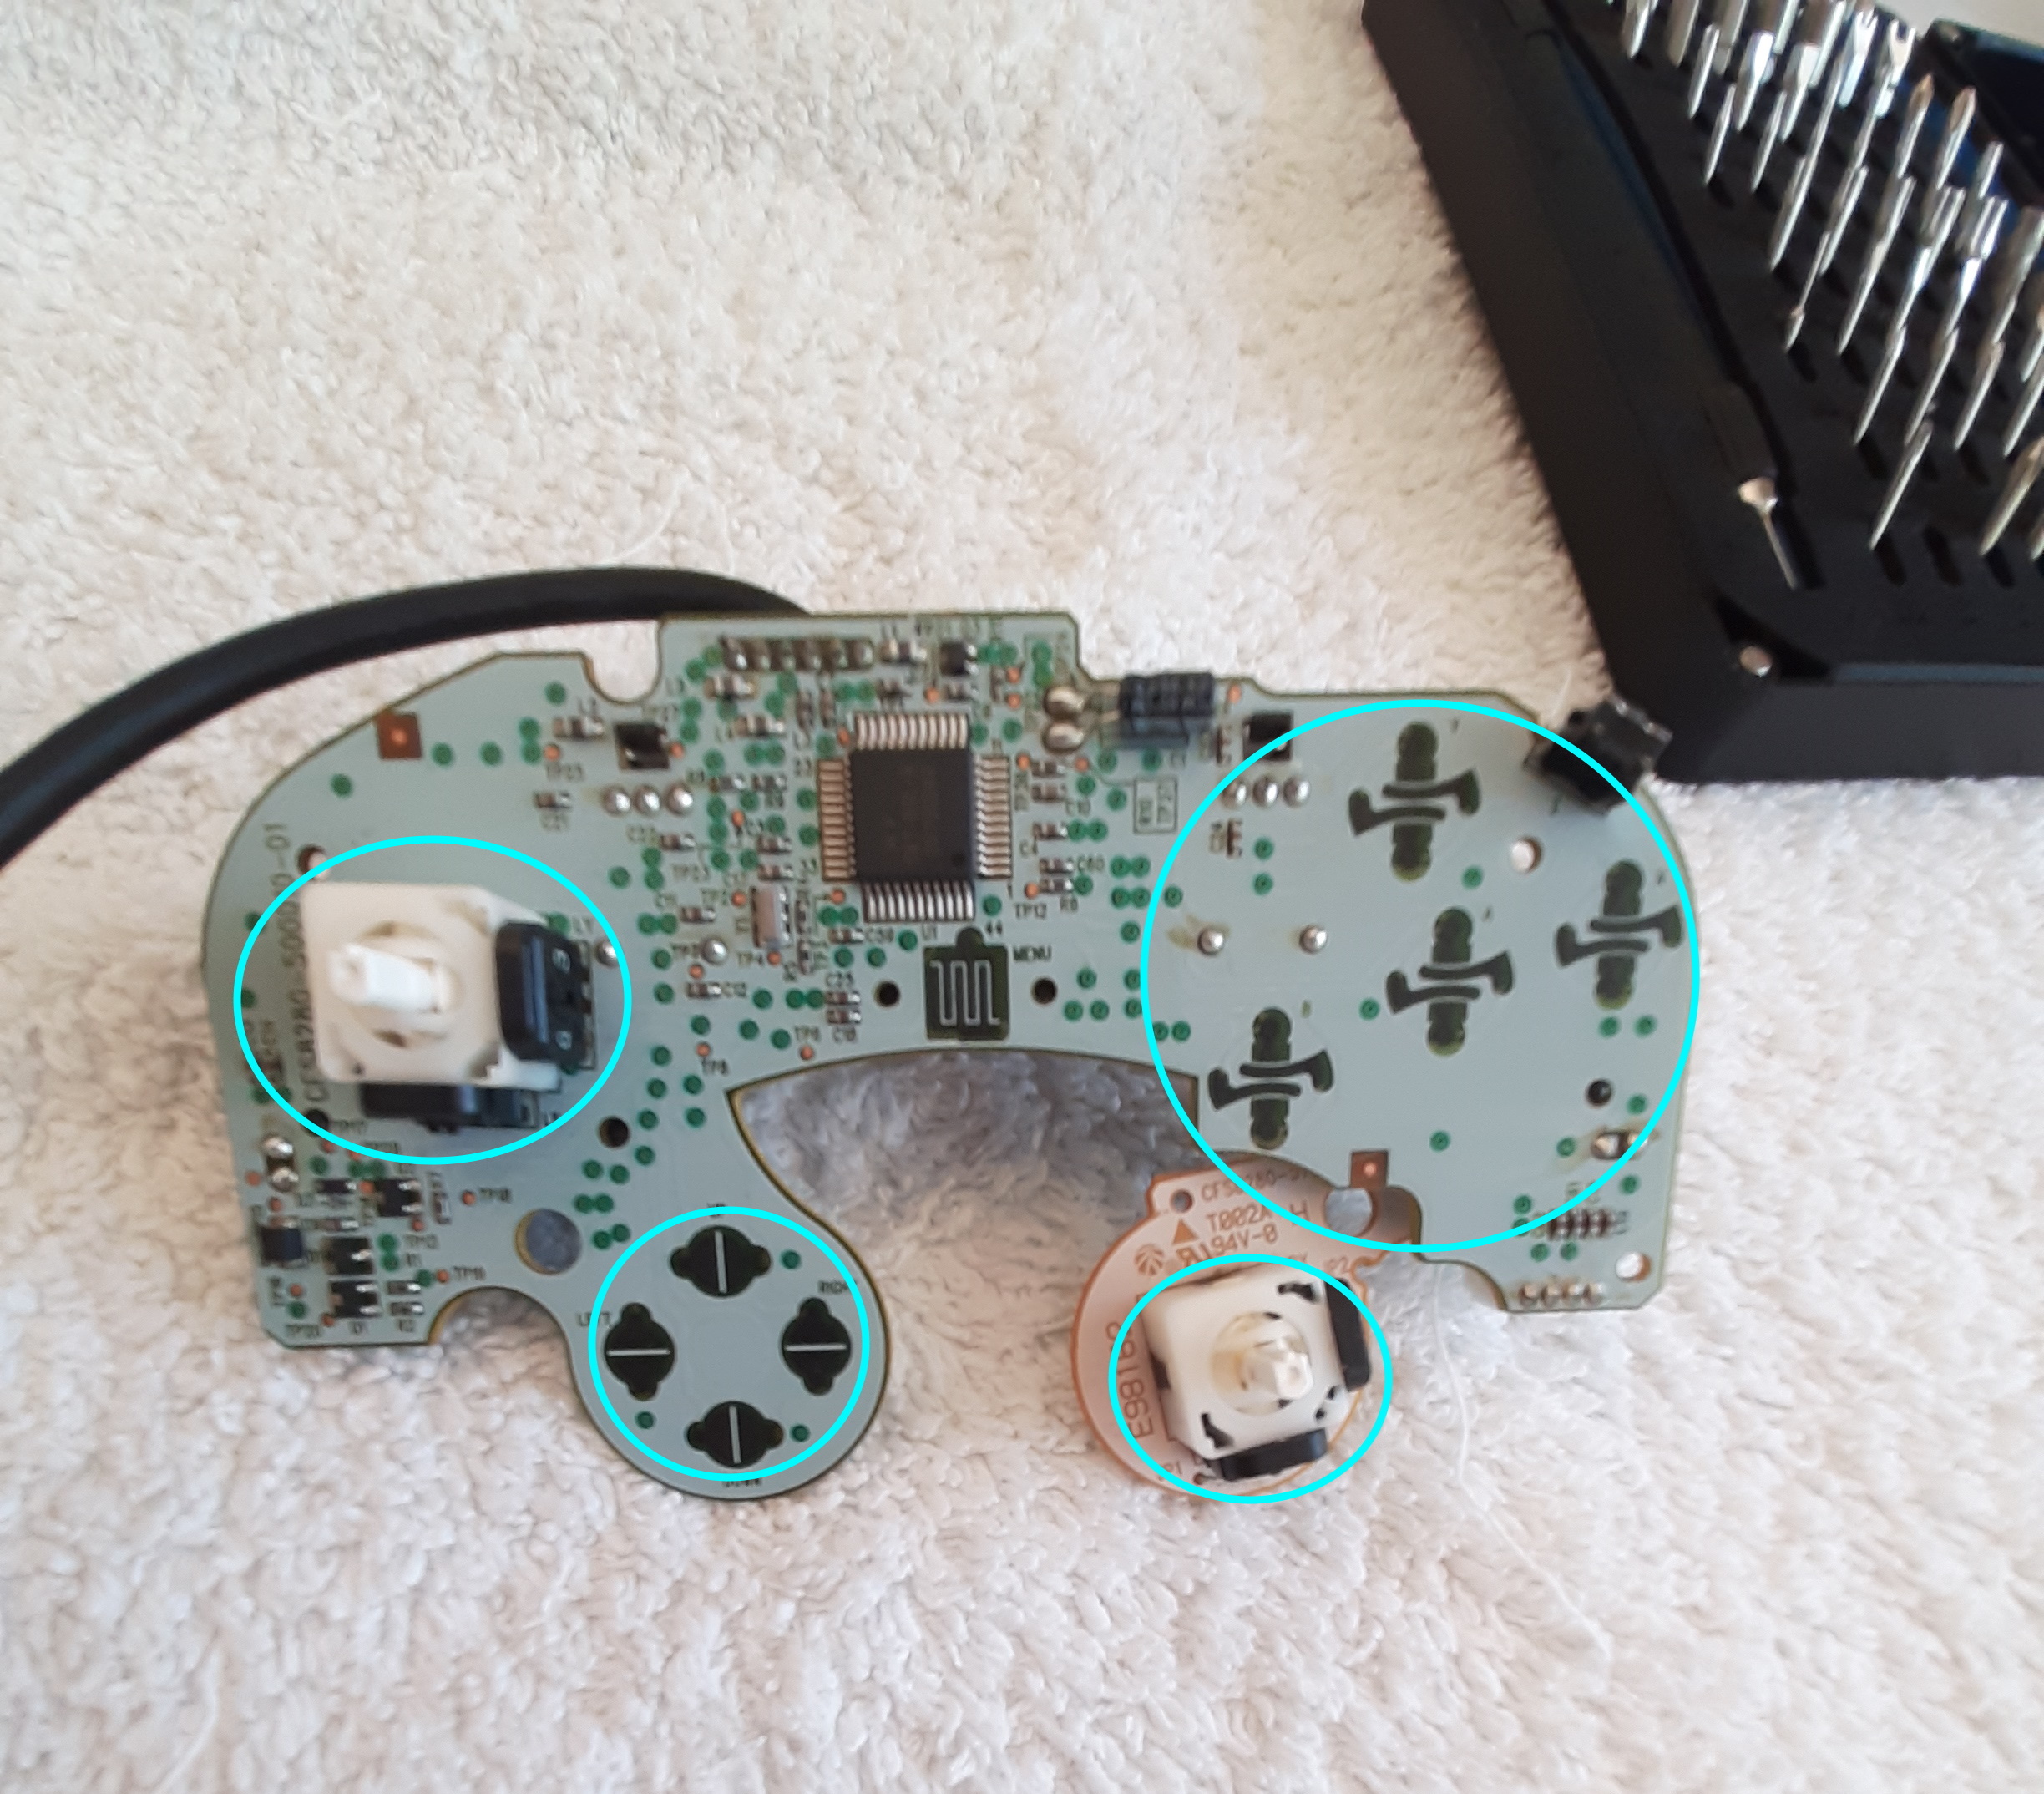
- To wash the motherboard, dip a Q-tip in rubbing alcohol (a toothbrush also works, though be careful that it is completely dry) and rub the board.
- Clean the areas beneath the contact pads and the stick bases thoroughly.
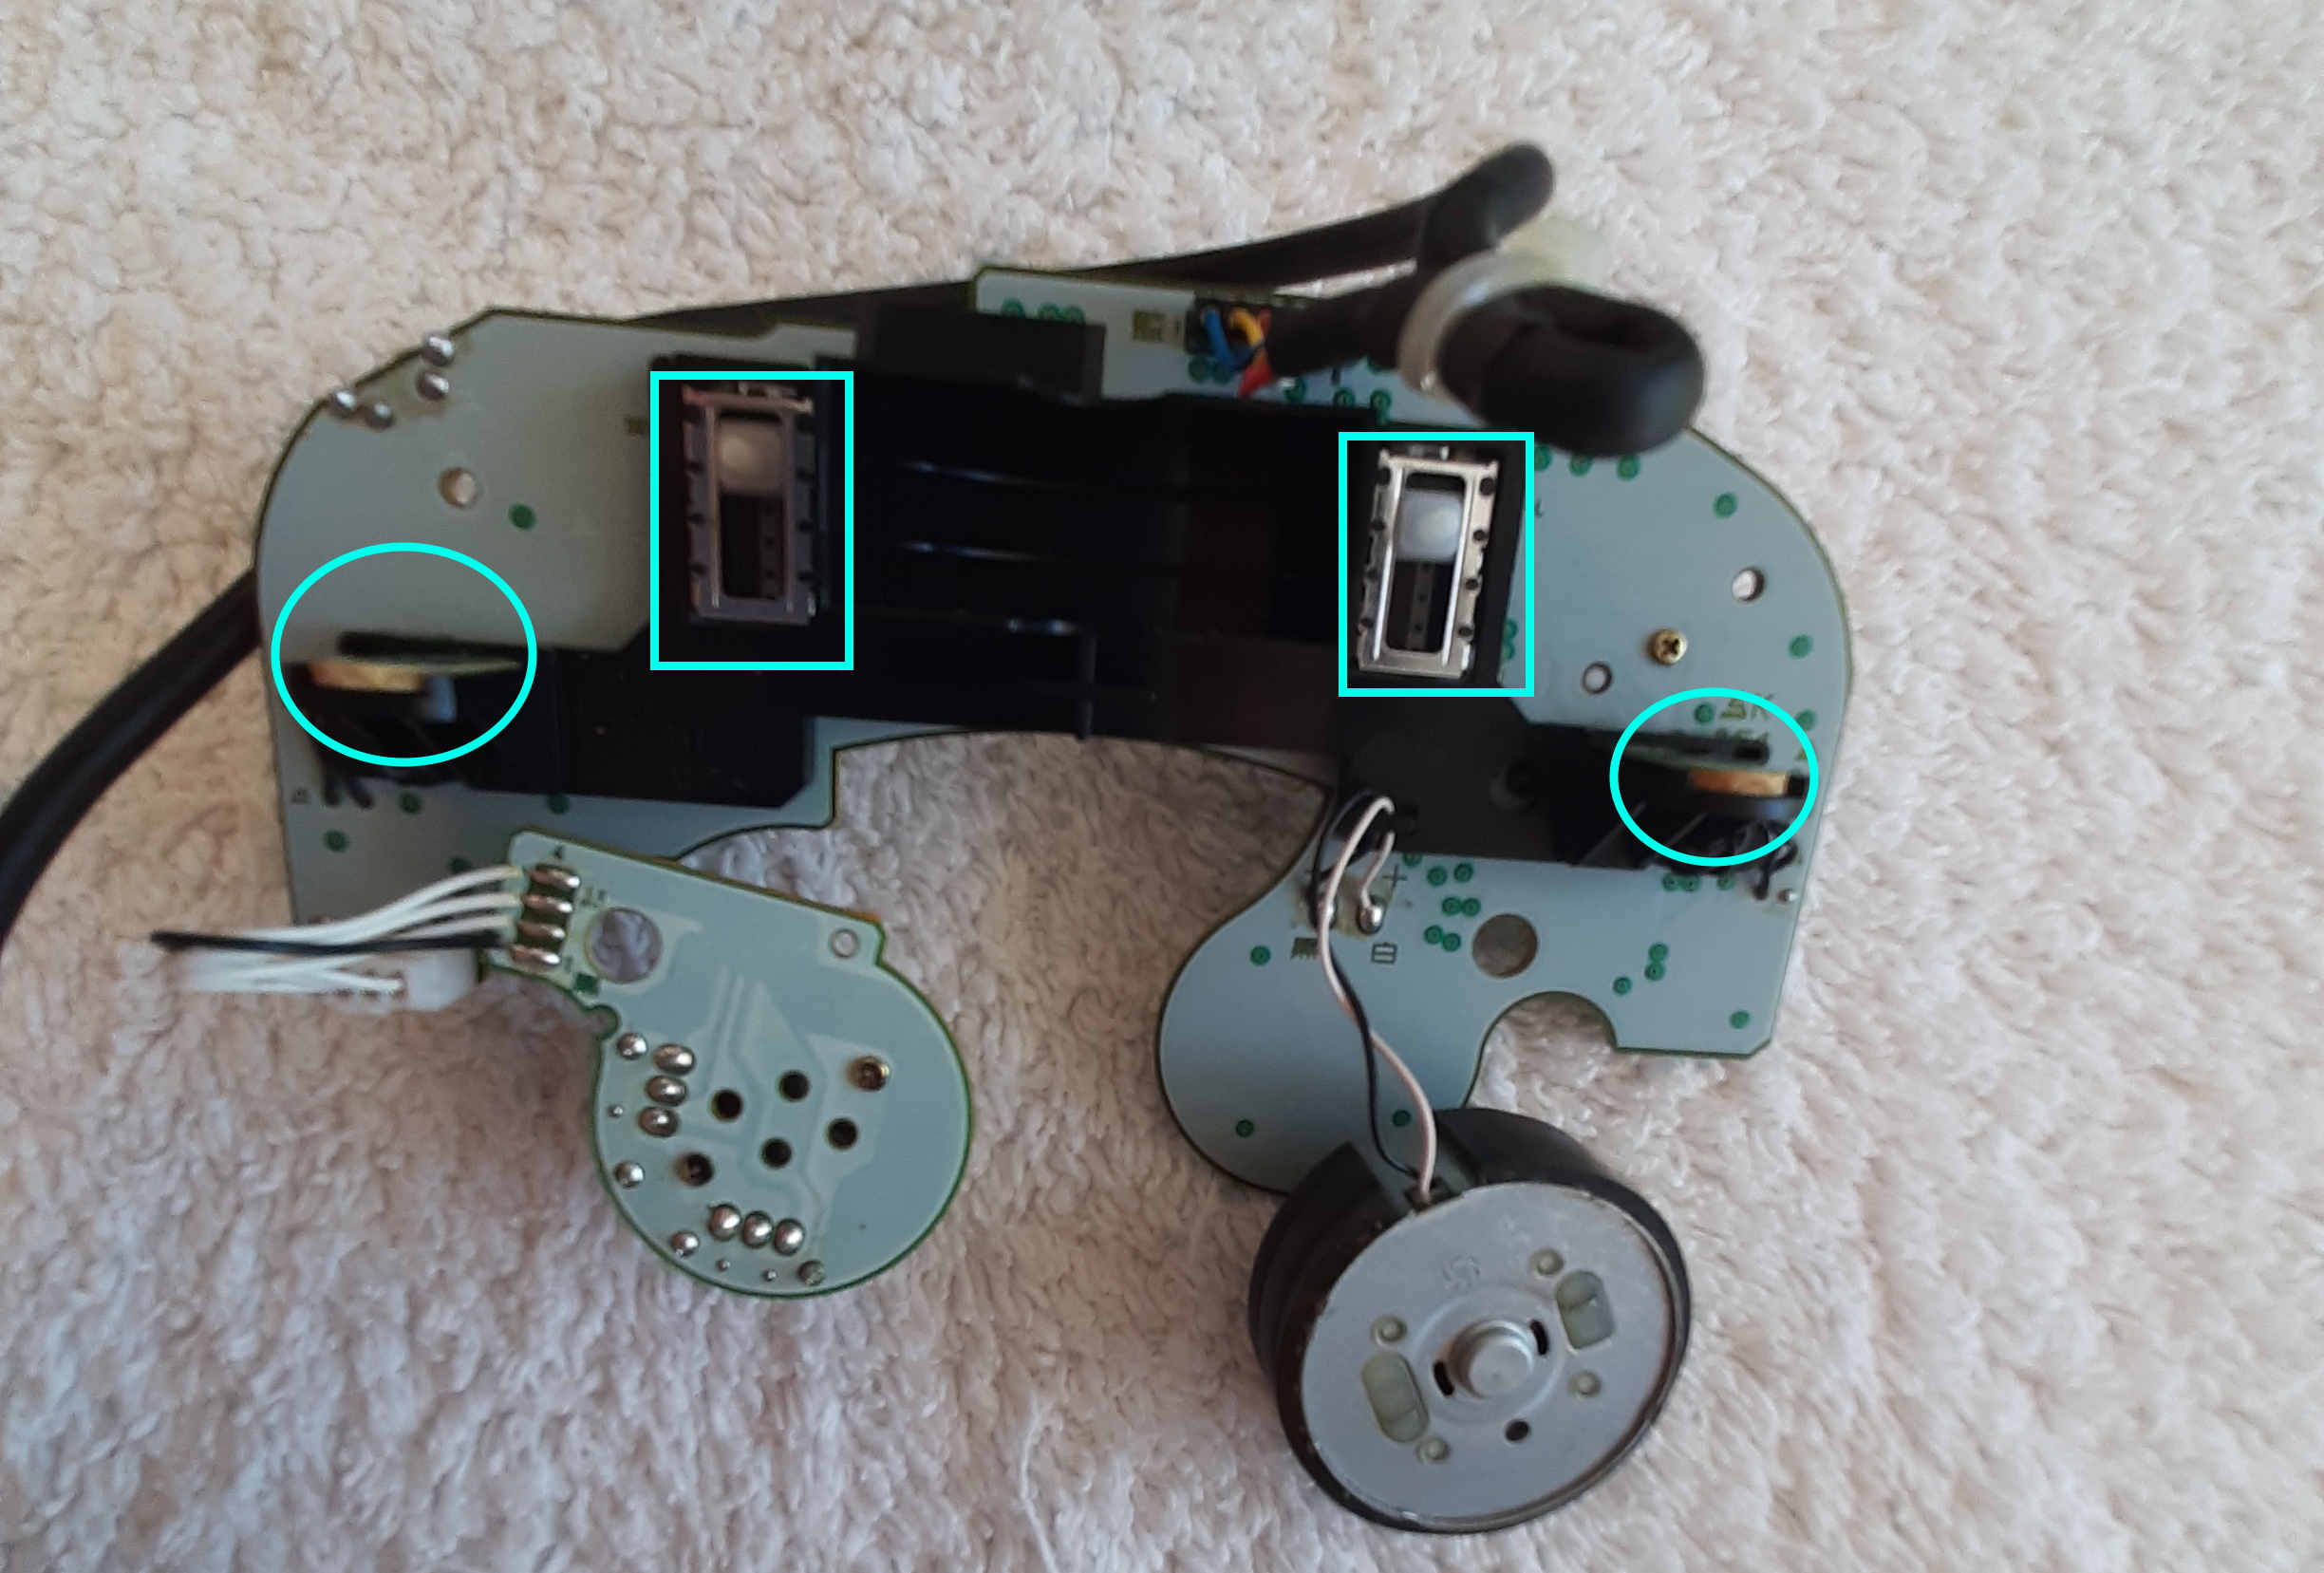
- On the backside of the board, clean the sliding potentiometers and the black pads that the triggers press down on.
- You can also quickly scrub the metal pieces with a toothbrush and some alcohol if you wish to, but it’s usually not necessary.
- Once you’re done, follow the steps back up to reassemble the controller.
- The sticks have a small notch on their underside which indicates which way is up.
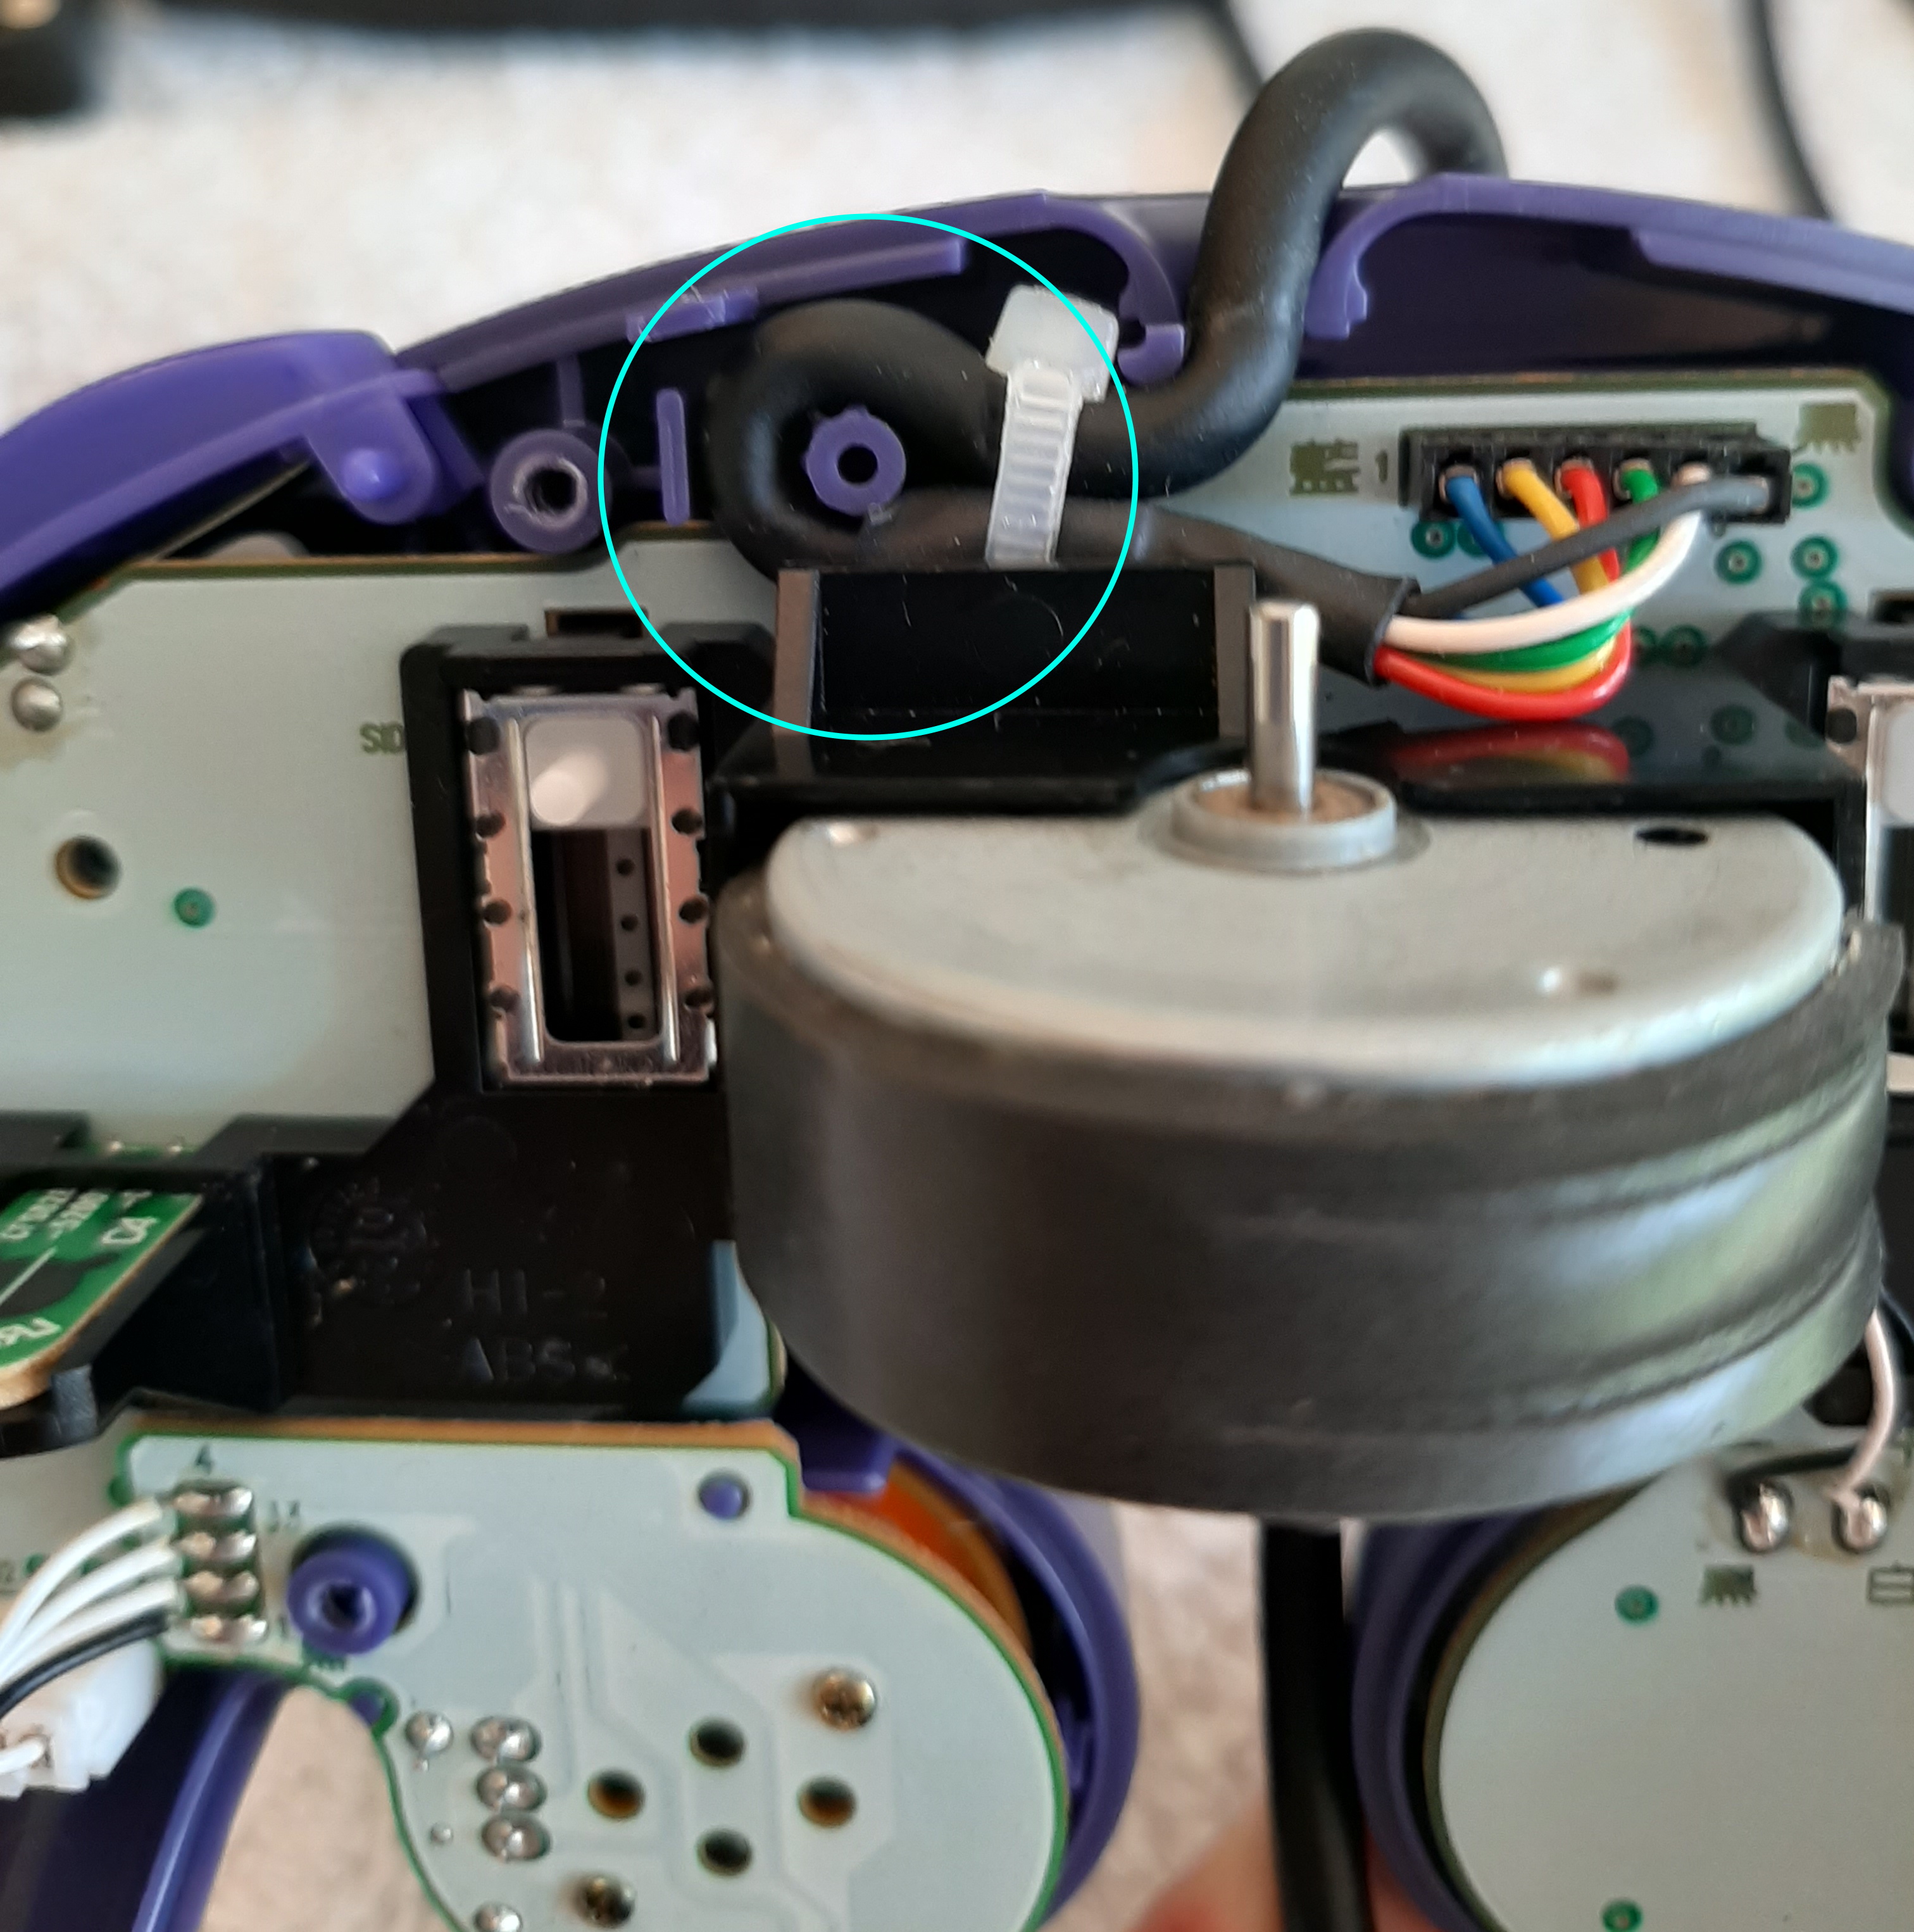
- The controller cord won’t fit if it doesn’t encircle this small peg above the rumble motor. Push down on it hard so it stays put as you manipulate the shells.
- Make sure the sliders for the triggers are pushed all the way up before putting the shells back together.
Control Stick Guide
- Dropped spins can be caused by manual input error, but they can also be caused by a well-documented deffect on the control stick called PODE - Potentiometer Oddity Degradation Effect. It is a complicated issue, but the gist is that it can cause the controller to ignore certain stick inputs, which can result in dropped spins.
- Detailed technical information about PODE can be found here.
- Getting rid of PODE unfortunately requires changing the potentiometers, which is usually accomplished by just buying a new GCC, but it can also temporarily be reset by following this guide.