Ricco 2
Ricco 2 has two sections to it. The first section is the outside section, which has two strats, the beginner strats riding the Blooper, with the advanced strat , labeled Blooperless, taking the sewers over the fish market area. The second section is where a Pianta informs you on what spawns the shine- you must finish a blooper race. This has to be in under 45 seconds, with a secondary shine spawning from completing the race in under 40 seconds.
We are able to beat this threshold by quite a bit, even with beginner speedrunning technique, which is riding the Blooper. Alternatively, and optimally, there is a route, also known as “Blooperless”, which will see us climbing a wall and taking a route labeled below.
Starting out, it is not uncommon for beginners to do the Blooperless entry, but use blooper in the secret. Calculating by the RTA sheet as of August 11th, 2022, the Blooperless entry RTA Strat is 18.85, and the Blooper entry RTA IL is 21.38, creating a theoretical difference of 2.53 seconds. In terms of the race, the optimal time with Blooperless with no set-up, meaning RTA, is 16.74, and players using the Blooper can expect to clock in around 25 seconds or less. However, since Blooperless takes some in-game time to set up, the difference is not the entire length of those two times. RTA wise, it is also expected at an early level players get around 18 seconds or a bit less on average.
Entry
Beginner - Blooperful
( video by DespinSR )
- Upon starting this level, immediately turn the camera towards the bloopers as you load in, and prepare a hover-slide towards the dock.
- Optimally, you want to time your hover in the water to be as close as possible before you end up swimming. If you are new to the game, do not worry about this too much, it will come with practice.
- Once you get to the bridge, do a roll out to the Green Blooper. It should be noted that there is a possibility you bonk on the Pianta or umbrella, although this is uncommon.
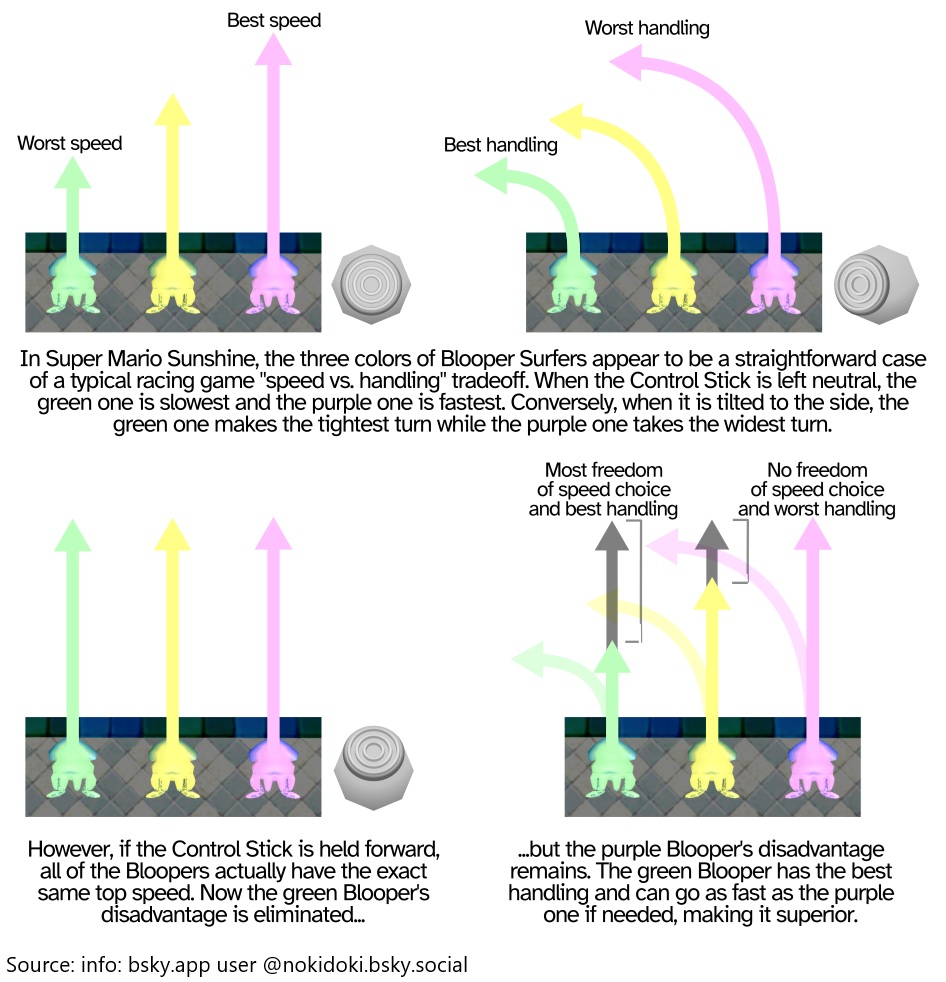
- SB_Runs in his speedruns at one point would instead take the Yellow Blooper. This offsets the risk of bonking in this section, albeit is technically slower, and also, the Yellow and Pink Bloopers restricts your steering of the Blooper, meaning Green Blooper is favored for the speedruns, as when you are holding up on the control-stick, you maintain an equal speed.
- If you are ever in a position on the Green Blooper where you are bracing a crash, if you hold neutral on the control stick, you will not die. This does not apply to the Yellow and Pink Bloopers.
- One thing to keep in mind as you enter is that you can still die against these walls. Sometimes this will be in a way where you still make it to the loading zone, but in general it is advised you keep a more middle path to not risk this mistake.
Intermediate - Blooperless
- Hoverslide towards the sewer then dive and ground pound into it
- Hoverslide through the sewer then rollout just before reaching the end
- Jump up the sewer while spraying, hover as soon as Mario exits the sewer then dive into the water that was sprayed
- Slide off the wall then y-turn into the entrance and hover into the loading zone
Blooper Race
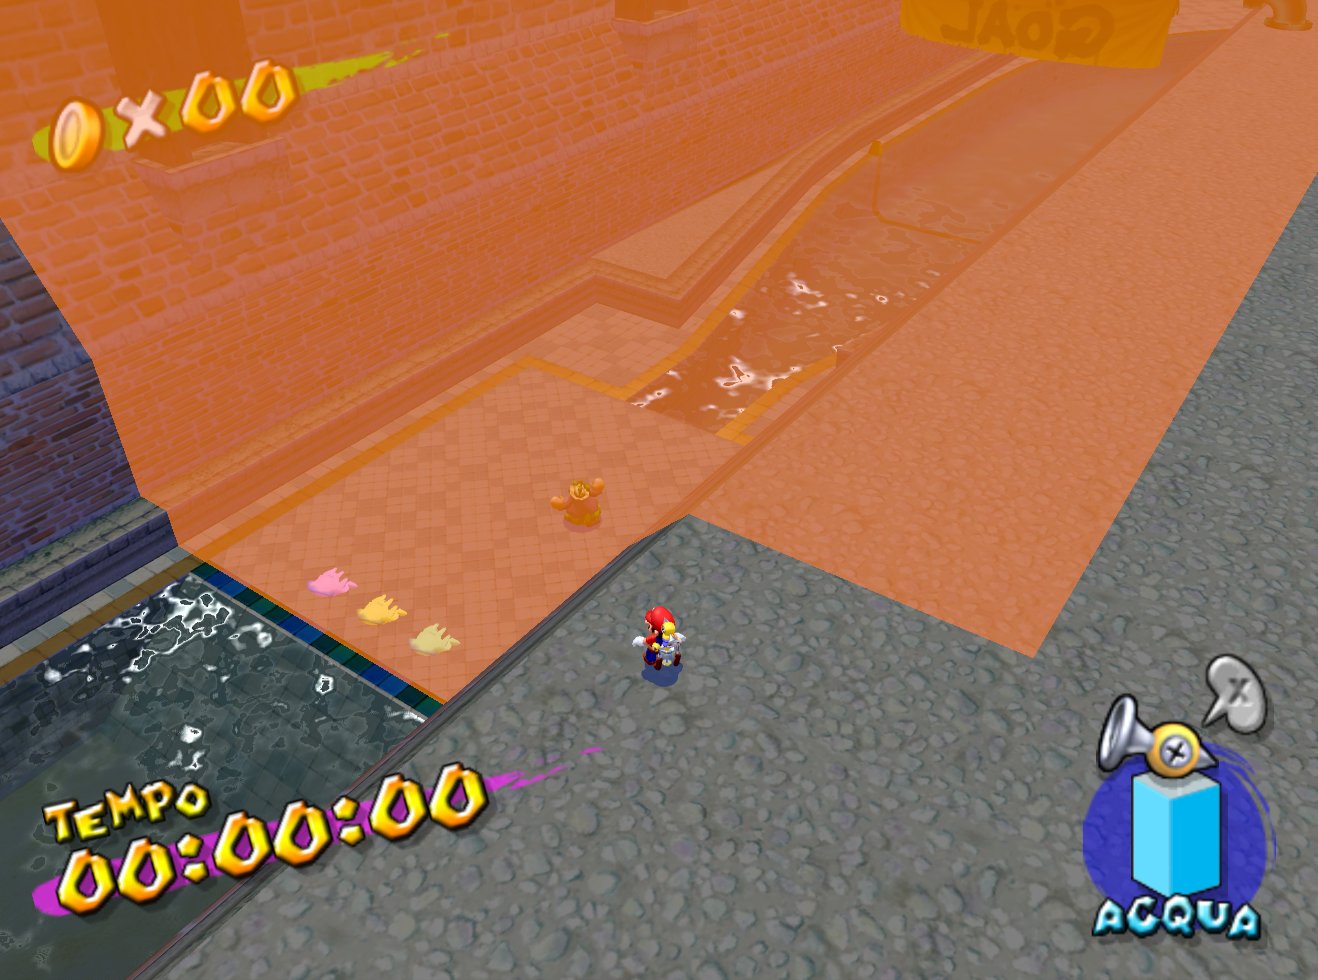
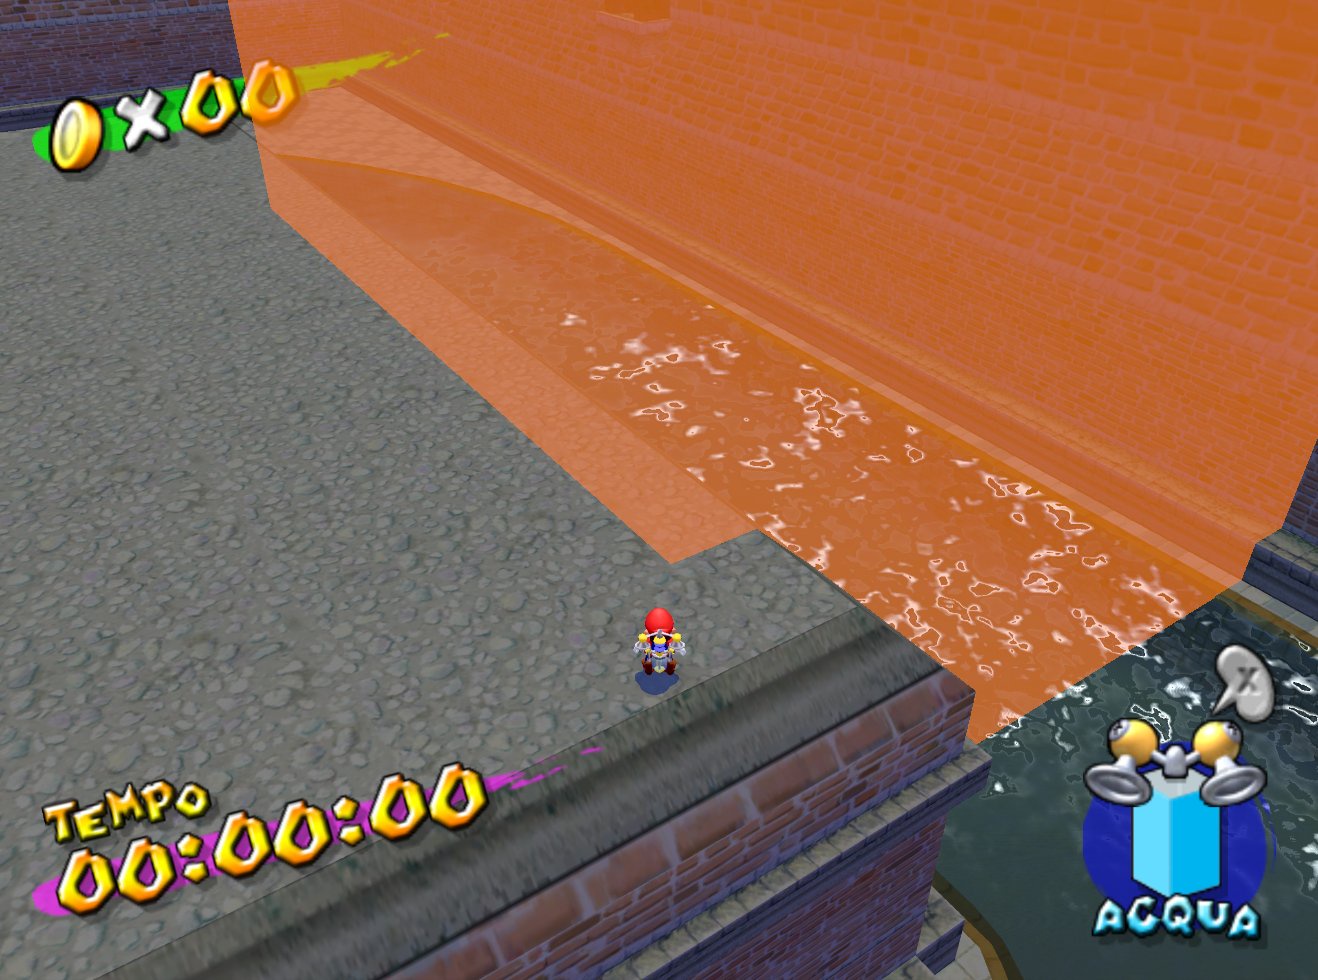
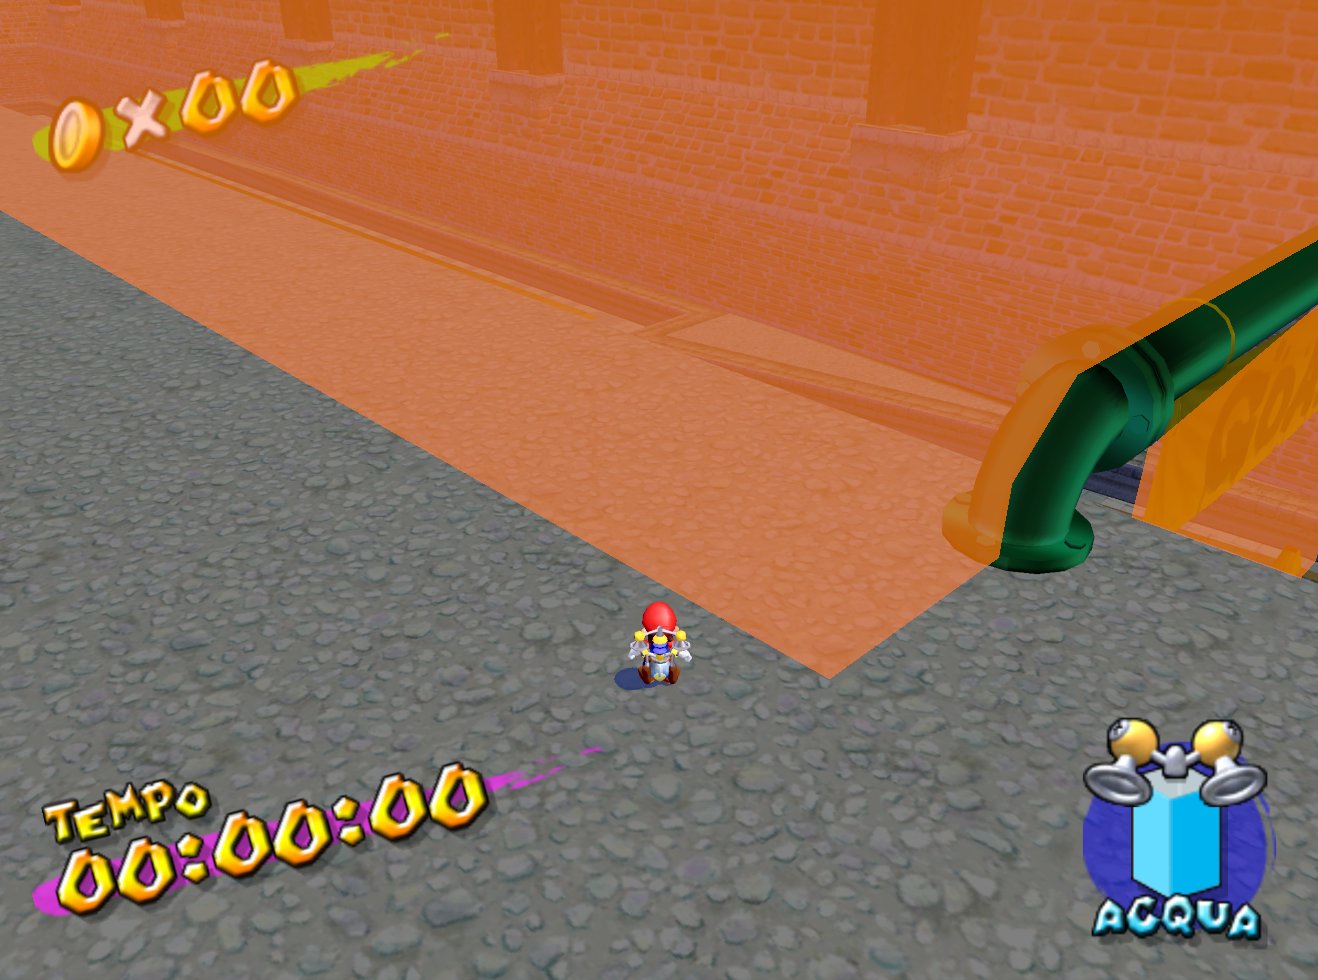
The checkpoints for the blooper race can be viewed here.
Checkpoint Images from Noki Doki

Beginner - Blooperful
( video by DutchJ )
- As you spawn, you have control of Mario. Pressing the B button about a half of a second before you hit the floor will give you a little distance towards the bloopers. You cannot do this too early, as the Pianta’s textbox will not spawn if Mario dives too far forward.
- Begin the race, taking things as sharp as you can while also being cognizant of the orange blocks up ahead.
- Cut through the cones and make a jump over the wall. Once you jump over this wall, take a left to go over the next wall.
- The shine is now complete. You can repeat these exact instructions to complete Ricco 2 Hidden.
Intermediate (Standard, Buffered Spin) - Blooperless
( video by LotfySMS )
- Hold left while entering the race. After talking to the pianta, hoverslide up left.
- Do a full rollout to land on the ledge, then buffer a spinjump up right.
- Hover to land on the small ledge, then hit a double jump and either hoverslide or spray and slide across the wall.
- Fall off the wall, briefly hover, then spray while continuing to hold forward
- Double jump to maintain speed and reach the first checkpoint. Turn around and hoverslide
- Fall off the ledge, double jump, then triple jump while spraying. Dive into the water that was sprayed
- Slide forward, fall off, then spin jump and hover up to the next checkpoint
- Hoverslide to the end, fall off the wall, and hover to the shine position
Intermediate (Alternate, Jesus Strat) - Blooperless
( video by Zeldocto )
These points will only cover the difference of the strat compared to above.
- After watersliding and falling off the ledge where you would triple jump, instead you will switch to your nozzle then spam spray as you fall off the ledge.
- Dive again to slide on the water, and fall off the ledge again across the water
- Right before falling into the water, hover across then double jump dive. If you timed the hover correctly you will be coated in water. A backup can be to spray as you double jump.
Intermediate (Alternate Start, GWKH) - Blooperless
( video by schmittd )
- Hold up right while entering the race. Talk to the pianta, jump dive into him, then triple jump
- GWKH into the wall and hover onto the ledge. Jump on top of the wall and hoverslide across
Other subarea start methods can be seen being compared here.