Pinna 3
( guide by Zeldocto )
EYG Page
Pinna 3 is a highly technical level where you collect the red coins in the park.
This level has a two version differences.
- JP and NTSC-U/PAL have very slightly different ending electrokoopa cycles, losing JP about 0.5s at optimal level (31.xx IL time).
- You can hover after being shocked by an electrokoopa in JP only.
Entrance
Click for Details
Entering the park is the same as Pinna 1, 3, 7, and 8.
One Slide
-Tap jump, then dive.
-Instead of performing a rollout, bellyhop (press B) directly after which leads into a waterslide.
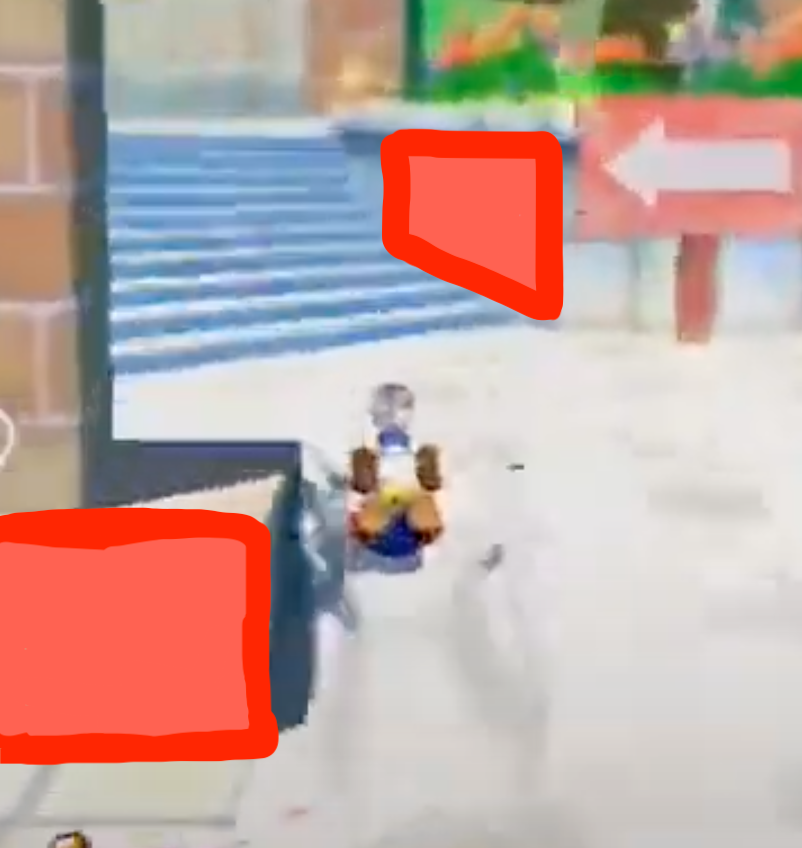
To get through the entrance with a single slide requires some maneuvering between obstacles. The image above highlights two main points to avoid bonking off. The easiest way to do this is by first leaving a bit of space between Mario and the wall. After sliding past the forward-facing section of the wall, you can then hold the control stick forward and in toward the wall. Once Mario is sliding against the side you should be able to slide through freely without bonking. Notice that holding in towards the walls also help to avoid bonking on the further ahead wall and noki at the entrance.
Coin Approach
Go-Around
Beginner
( video by Metacor )
- Waterslide to the awning, rollout and spinjump dive into a bounce off the awning
- Hover and do a buffered landing spinjump out of the 1st coin
- Hover at the peak of your spin and grab the 2nd coin
- Dive rollout up the grass hill and spinjump hover to the Pinna 8 platform
- Run off and hover to grab the grate for the 3rd coin
- Press B while holding R with the hover nozzle out at the edge of the grate to hover around on top of the grate
- Spinjump off the flip platform and hover to grab the 4th coin (Watch out for the seam of the flipping platform, a small gap can cause your inputs to be eaten)
- Press B again while holding R to hover around the grate
- Spinjump on top of the green box for the 5th coin
- If you are very fast here, you may need to wait for the boat to go down (cycle locked). If you reach this point and have to wait often, consider faster strategies.
- Do a running jump off the green box into the center of the ship and you should always grab coin 6. Zooming out the camera can help here.
- Hover as you grab the coin, and do a landing buffered spin off the ship’s sail
- Hover and land on the green girder, and spinjump hover up to the grate to grab coin 7.
- Either climb up or hover around and run up the green ramp to save some time
- Run up the ramp and grab the 8th coin, optimally jumpdiving just before you grab it with an angle into the shine.
Boat Hop (No Coin Clip)
Intermediate
( video by Jukatox )
Boat Hop
Intermediate
( video by FoundYourGun )
- Waterslide to the awning, rollout and spinjump dive into a bounce off the awning
- Hover and do a buffered landing spinjump out of the 1st coin
- Y turn just after the peak of your jump (many people hold up right here instead of straight right)
- Exit Y-cam and wallkick off the green girder into coin 2 (alternatively you can skip the y turn with correct cycle timing as done in the Boat hop coin clip video by FYG, although this is more difficult)
- Hover as you grab coin 2, turn cleanly into the oncoming boat and dive rollout hover onto it, hovering onto the next boat
- Stand on the slope of the boat, run and jump off grabbing coin 3 and time a hover into coin 4 (can use a midair spin to make timing easier)
- Either grab and hover around the grate or more optimally ledgegrab near the pinna 8 platform, press B to enter a wallslide, the jumpdive y-turn off the wall
- Spinjump off the flip platform and hover to grab the 5th coin (Watch out for the seam of the flipping platform, a small gap can cause your inputs to be eaten)
- Press B again while holding R to hover around the grate
- Spinjump on top of the green box for the 6th coin
- Jumpdive momentum spinjump off side of the boat and hover into the 7th coin (coin clip is much harder at this angle and distance)
- Run up the ramp and grab the 8th coin, optimally jumpdiving just before you grab it with an angle into the shine(Kaff dive).
TAS Strat
Advanced
- JP
( video by spilledBeansEverywhere )
- NTSC-U/PAL
You can run straight up the ramp past the electrokoopas, compared to having to zigzag on JP
( video by DespinSR )
- Waterslide to the awning, rollout and spinjump dive into a bounce off the awning
- Hover and do a buffered landing spinjump out of the 1st coin
- Y turn just after the peak of your jump (many people hold up right here instead of straight right)
- Exit Y-cam and wallkick off the green girder into coin 2 (alternatively you can skip the y turn with correct cycle timing as done in the Boat hop coin clip video by FYG, although this is more difficult)
- Hover as you grab coin 2, turn cleanly into the oncoming boat and dive into the slope of the boat and do a momentum spinjump towards coin 3
- Hover and grab goin 3, then either jump off the left of the boat around the bowsprit (no tip of the ship), or more optimally you can do a short hover into coin 3 and do a buffered spinjump off the bowsprit (tip of the ship). A 32 IL time is just possible with no tip of the ship.
- Cancel your jump with a hover onto the top of the green box to grab coin 4
- Either run off or jump off and Y-turn into the 5th coin, make sure to have a consistent angle in your Y-turn to manipulate the electrokoopas as detailed below.
- Hover shortly and dive and slide off the green grate, and hover into coin 6
- Hover over to the lower pinna 8 platform with the tree, sideflip or spinjump hover cancel over the noki and spinjump dive towards the green ramp
- Do a rollout momentum spinjump off the slope, and hover at a wide angle into the side of the grate, clipping through the middle of Mario and grabbing the coin with his feet
- Dive rollout and run up the ramp, around the right for the middle electrokoopa and the left side for the top one, if you manipulated them correctly
- Jumpdive into the 8th coin with a good angle into the shine for an optimal finish
Manipulating the Electrokoopas - Click for Details
You need to Y turn while grabbing the 5th coin in the same way each time, in order to manipulate the electrokoopas. They start moving the second they come onto screen. It is recommended to turn straight right, upright can change it. 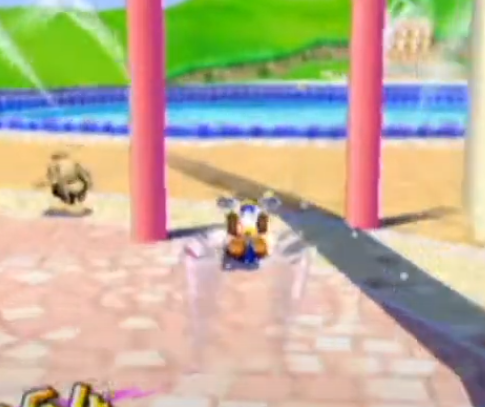
There are some different variations you can do for the TAS Strat detailed below.
Second Boat - Click for Details
Second boat can be dismounted either aggro (Tip of the Ship) or safe (Side of the Ship). 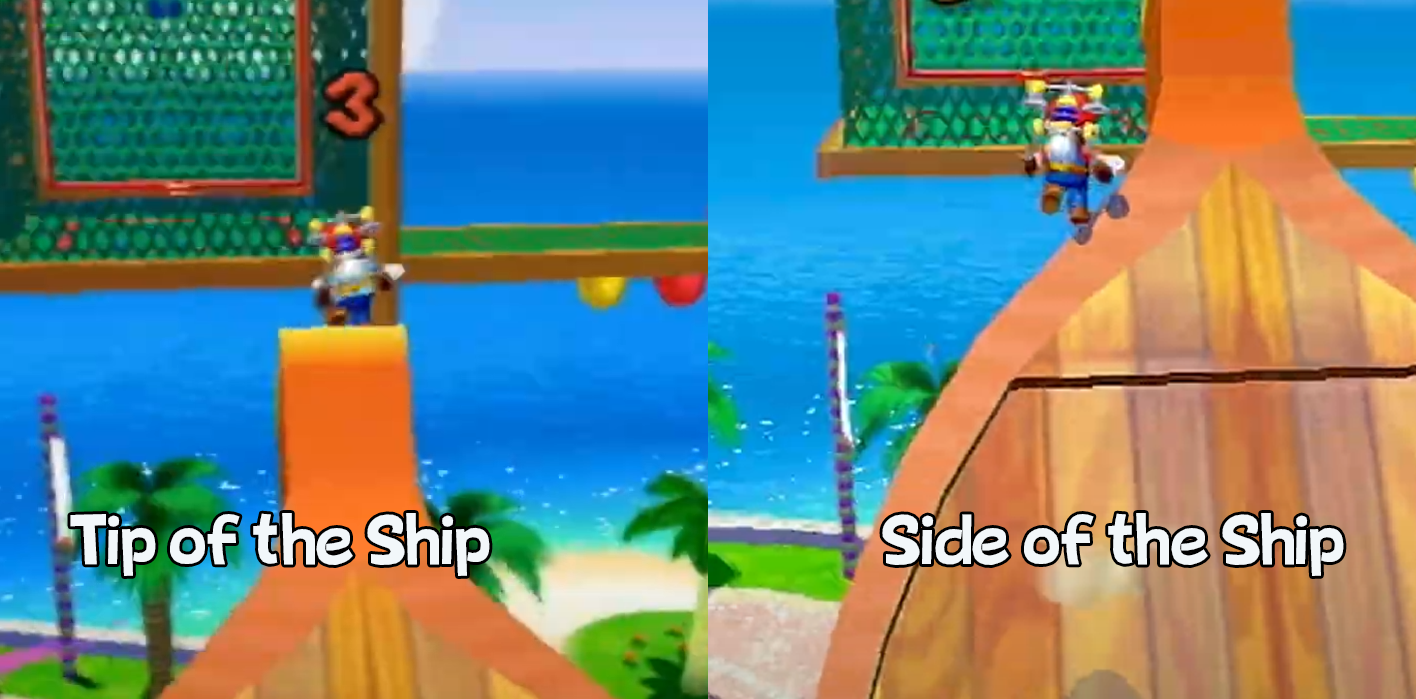
Coin Clip - Click for Details
Coin Clip (7th coin) is a difficult trick that saves around 2.0s and is largely feel based. The edges of the ramps (the wood) do not have collision, allowing you to clip inside these green grates.
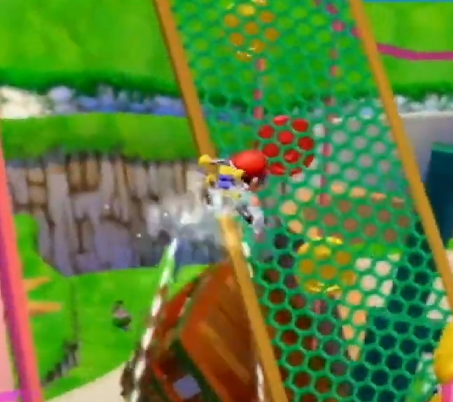
Coin Clip can be done on Left Side or Right Side (preference).